VPN #
VPN(虚拟专用网络,Virtual Private Network)是一种可以通过公共网络来安全传输数据的技术。通过VPN,用户可以在公用网络上创建一条加密的通道,从而确保传输的数据不被未经授权的用户窥视和篡改。
当然,对于大部分国内的人来说,使用VPN更多的是用来访问一些访问不了的应用或者网页,例如 Google,Twitter,YouTube 或者是加速游戏,打开Steam商店等…
不过市面上的VPN很难找,在iOS下载VPN也很麻烦,而且价格方面也不便宜。
当然接下来的方法也是需要付费的,因为我们需要一台服务器!
如果你的目标是免费VPN,那这个方案可能不适合你,但是如果你实在找不到靠谱的VPN,或者动动手尝试一下搭建属于自己的VPN也是不错的。 或者你和我一样刚好有一台用来练习,学习用的服务器,那正好让它多一项功能!
购买服务器 #
购买服务器可以用阿里云,腾讯云,华为云,百度云,或者其他云服务器提供商,购买服务器的价格根据自己的需求来定。 由于我是学习用的,所以我买了一台最便宜的服务器。可以参考如下:
我是在这购买的 👉 阿里云-云服务器ECS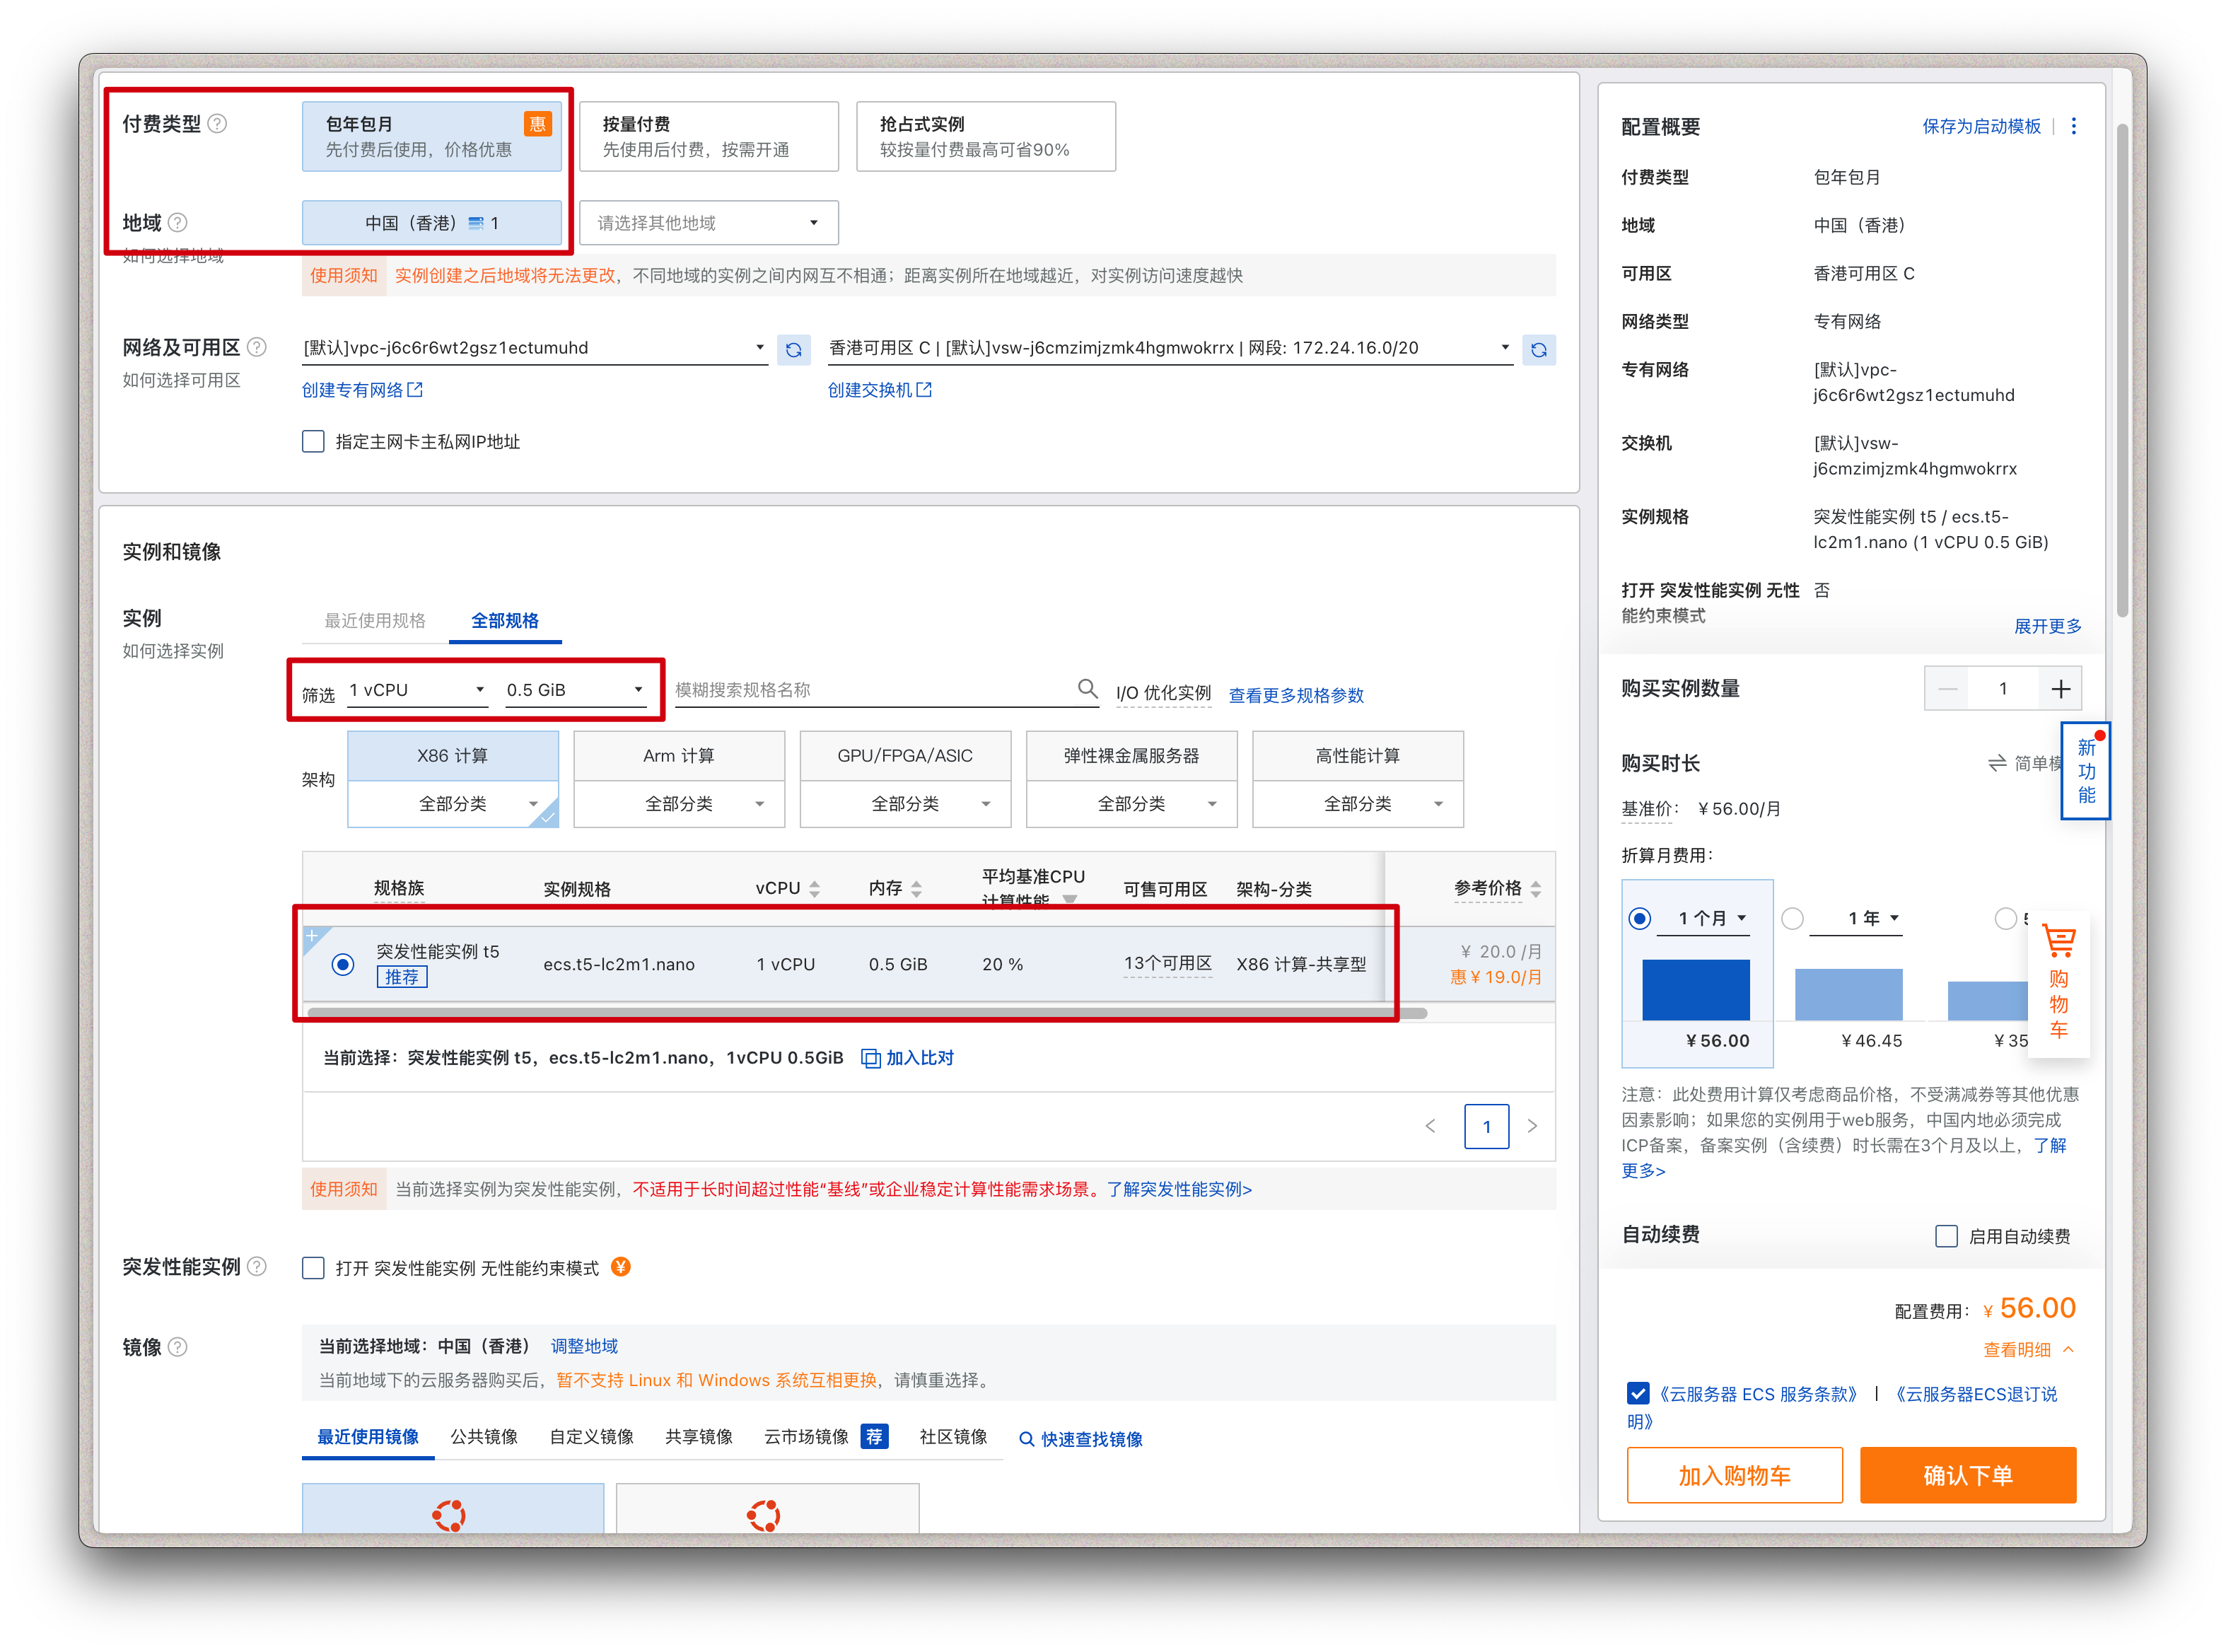
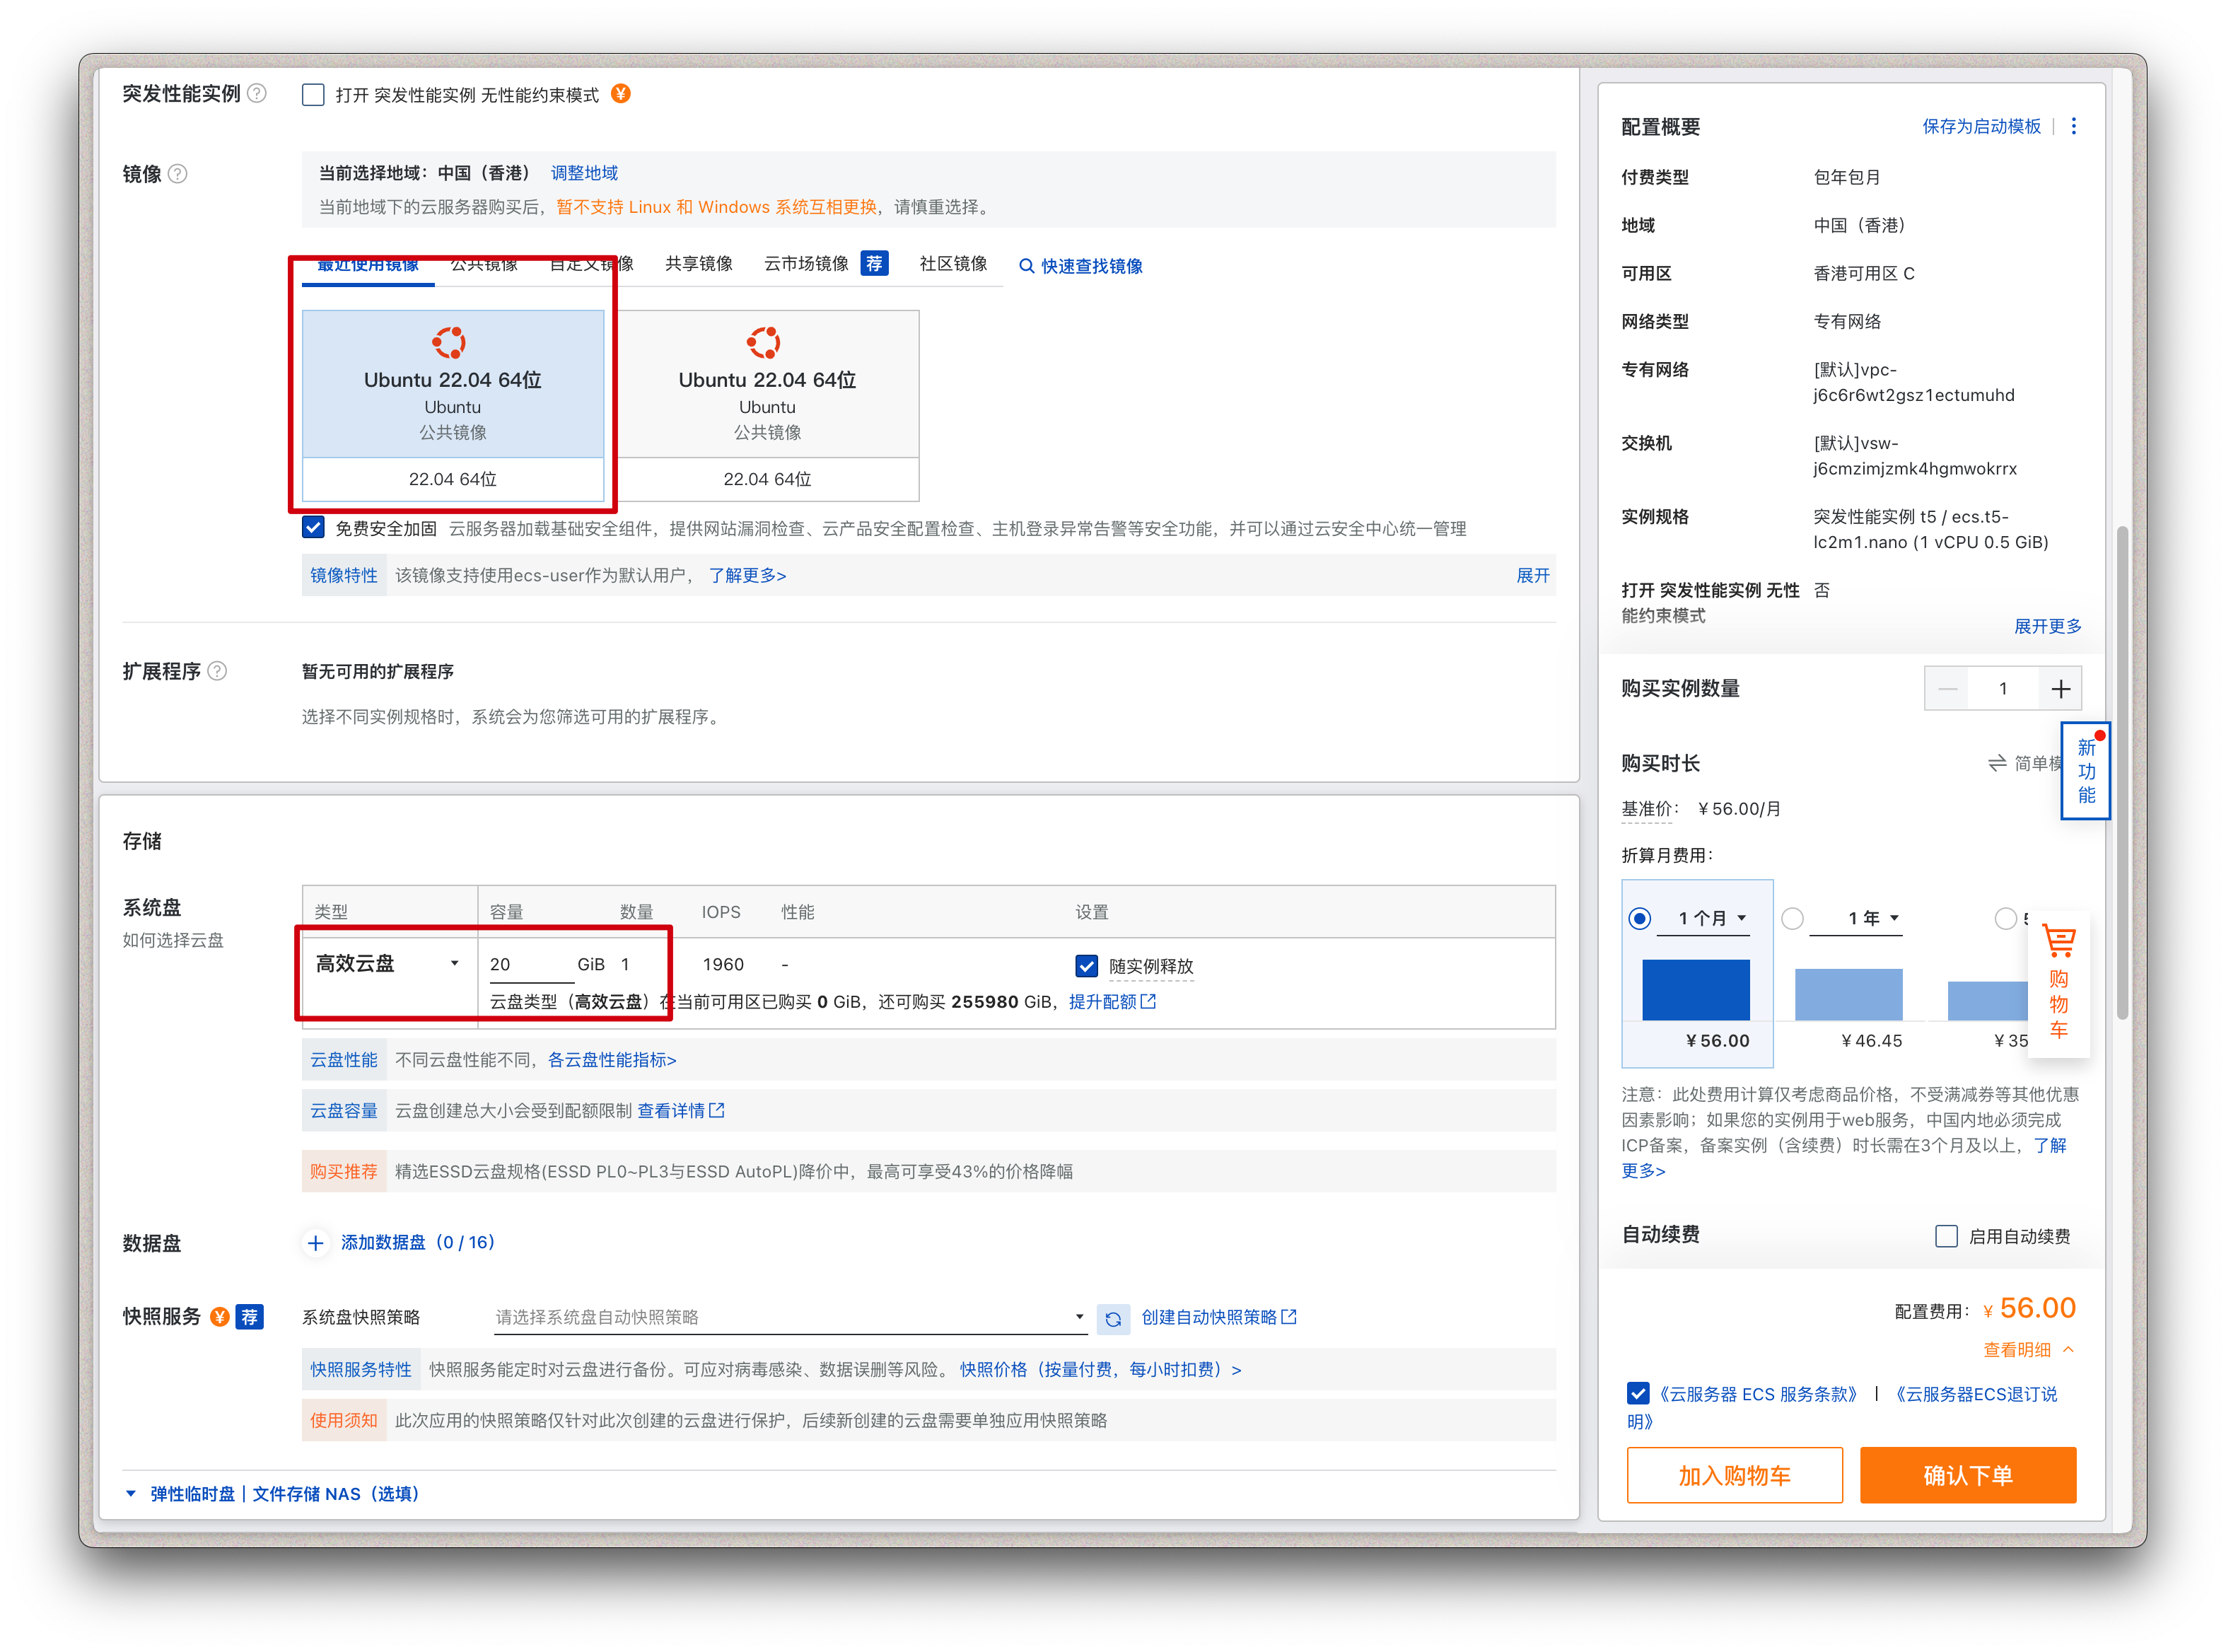
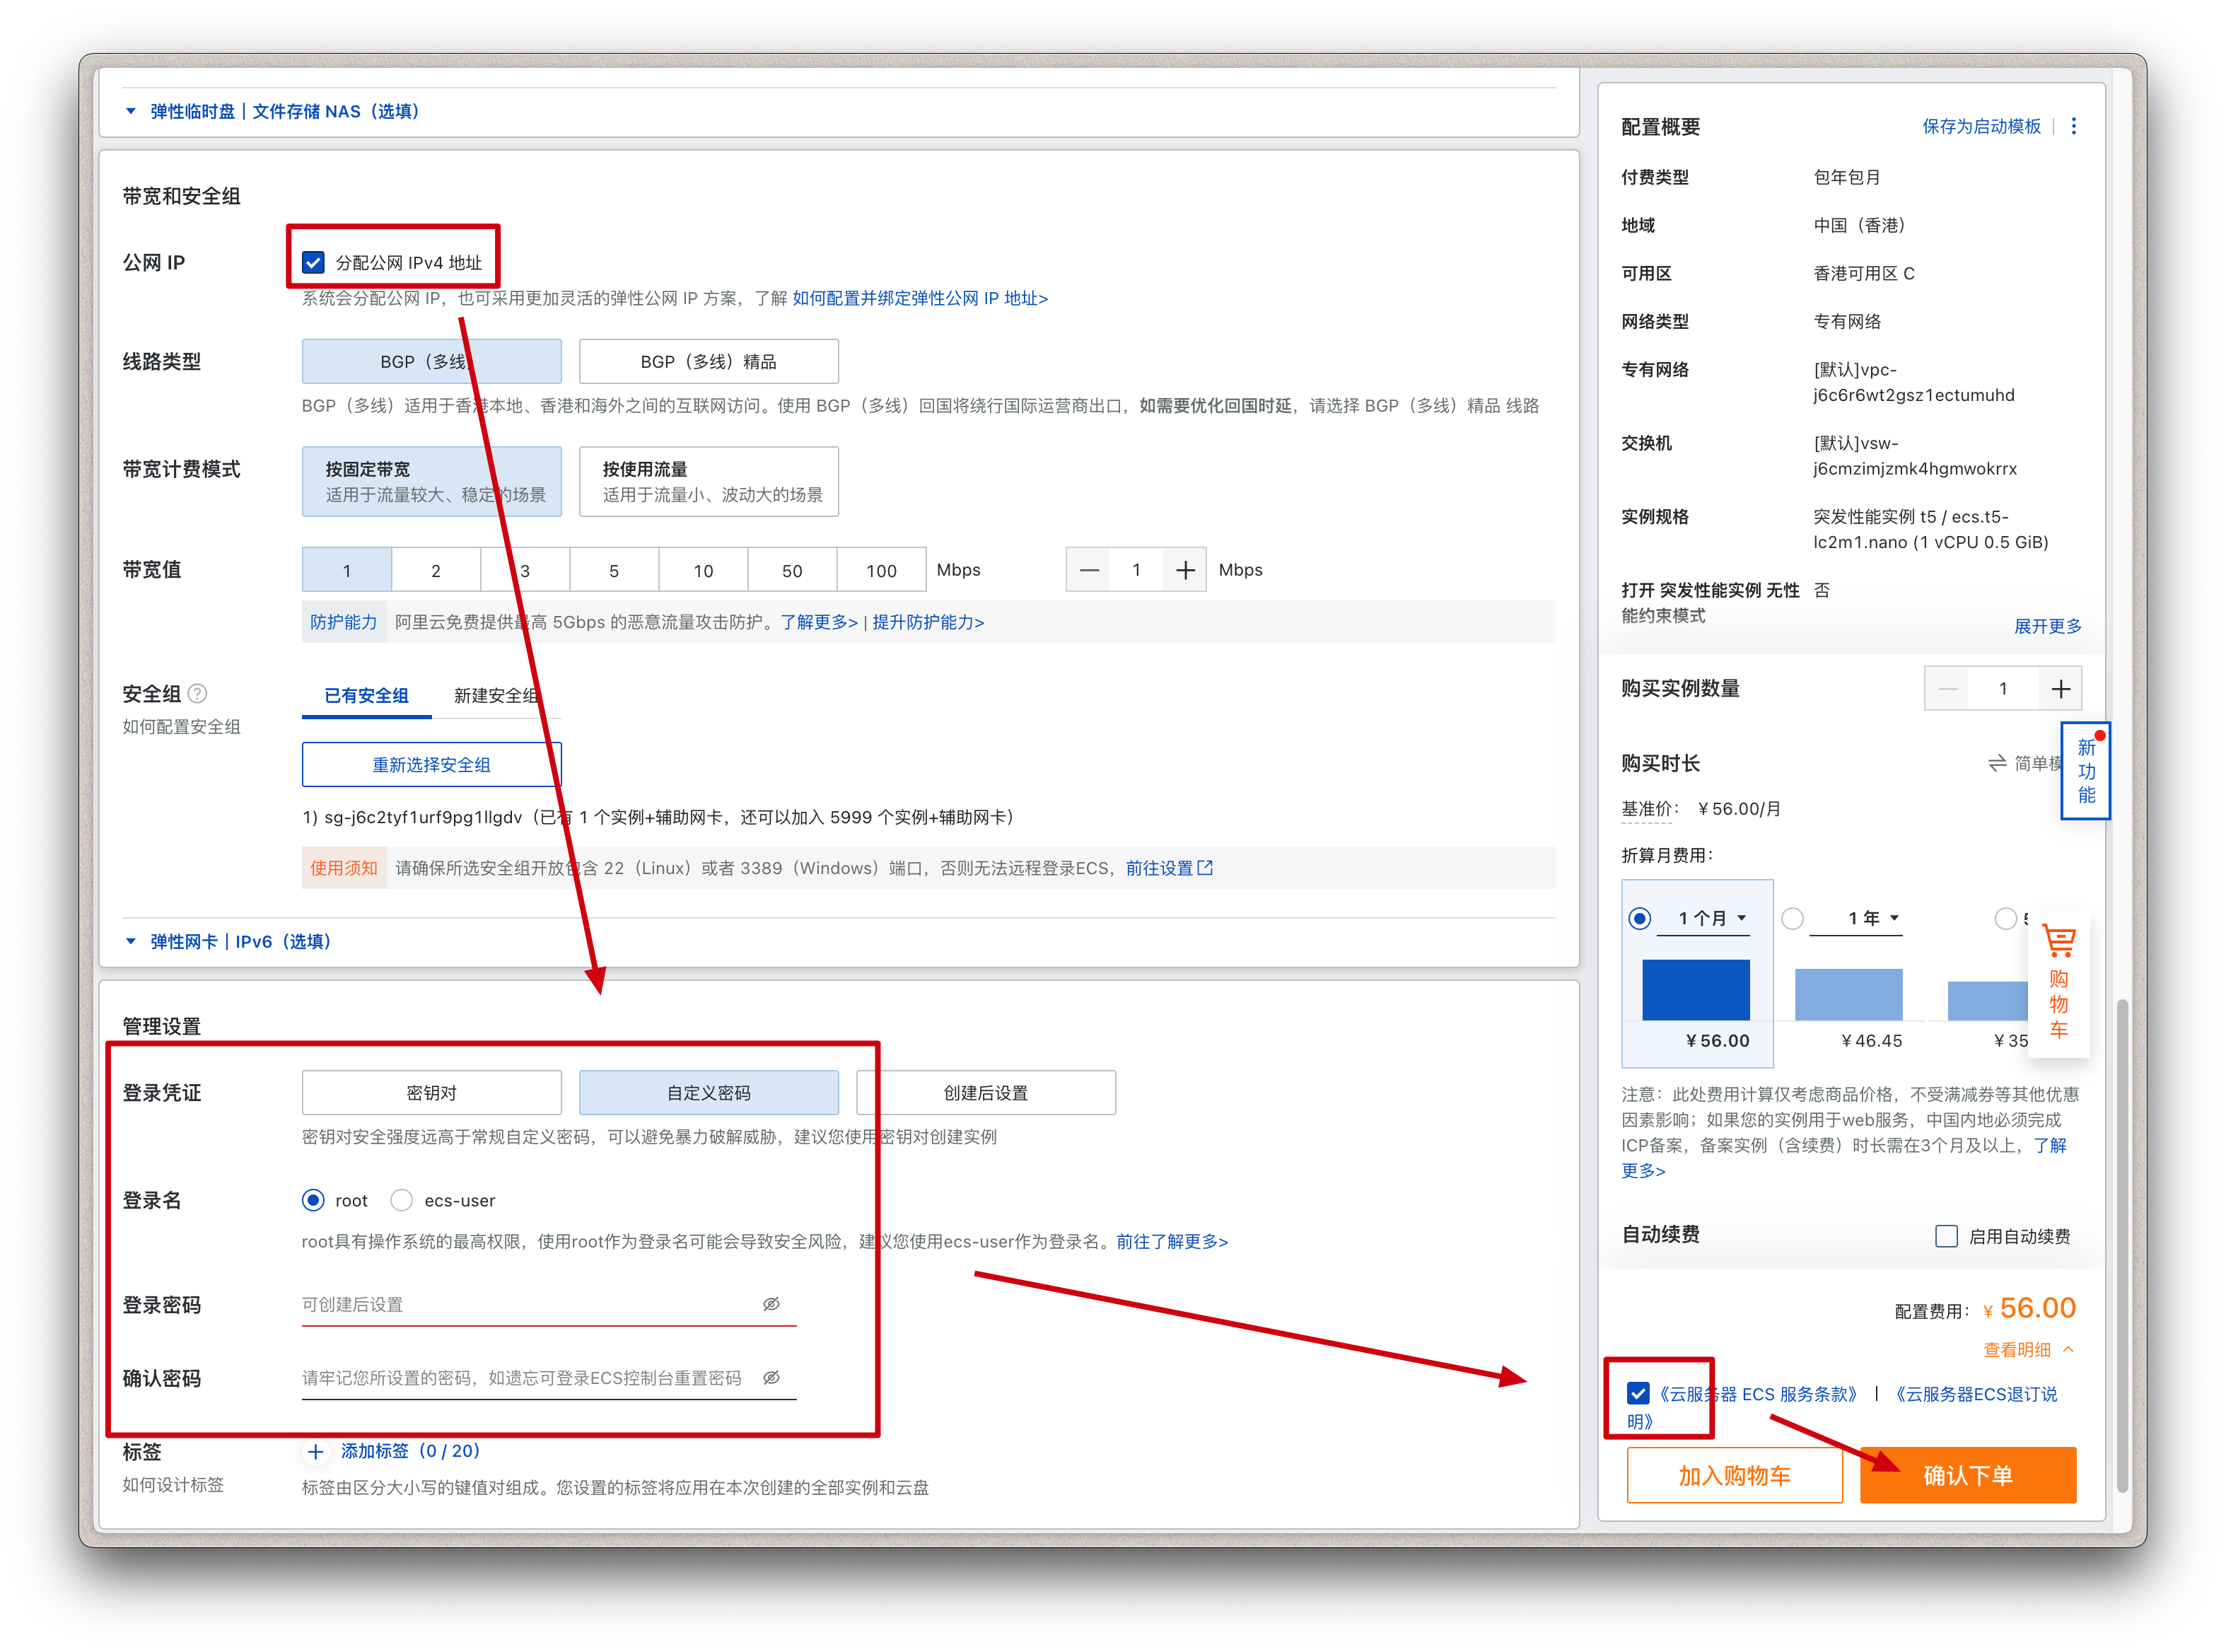
- 注意你的登录名:root,以及自己设置的密码哦!
- 注意:如果你的需求是为了打开海外的网站或应用,那么最好记得选择香港的服务器,或者是海外的服务器。
用 SSH 登录服务器 #
下载一个SSH客户端,我个人用的是 「Tabby」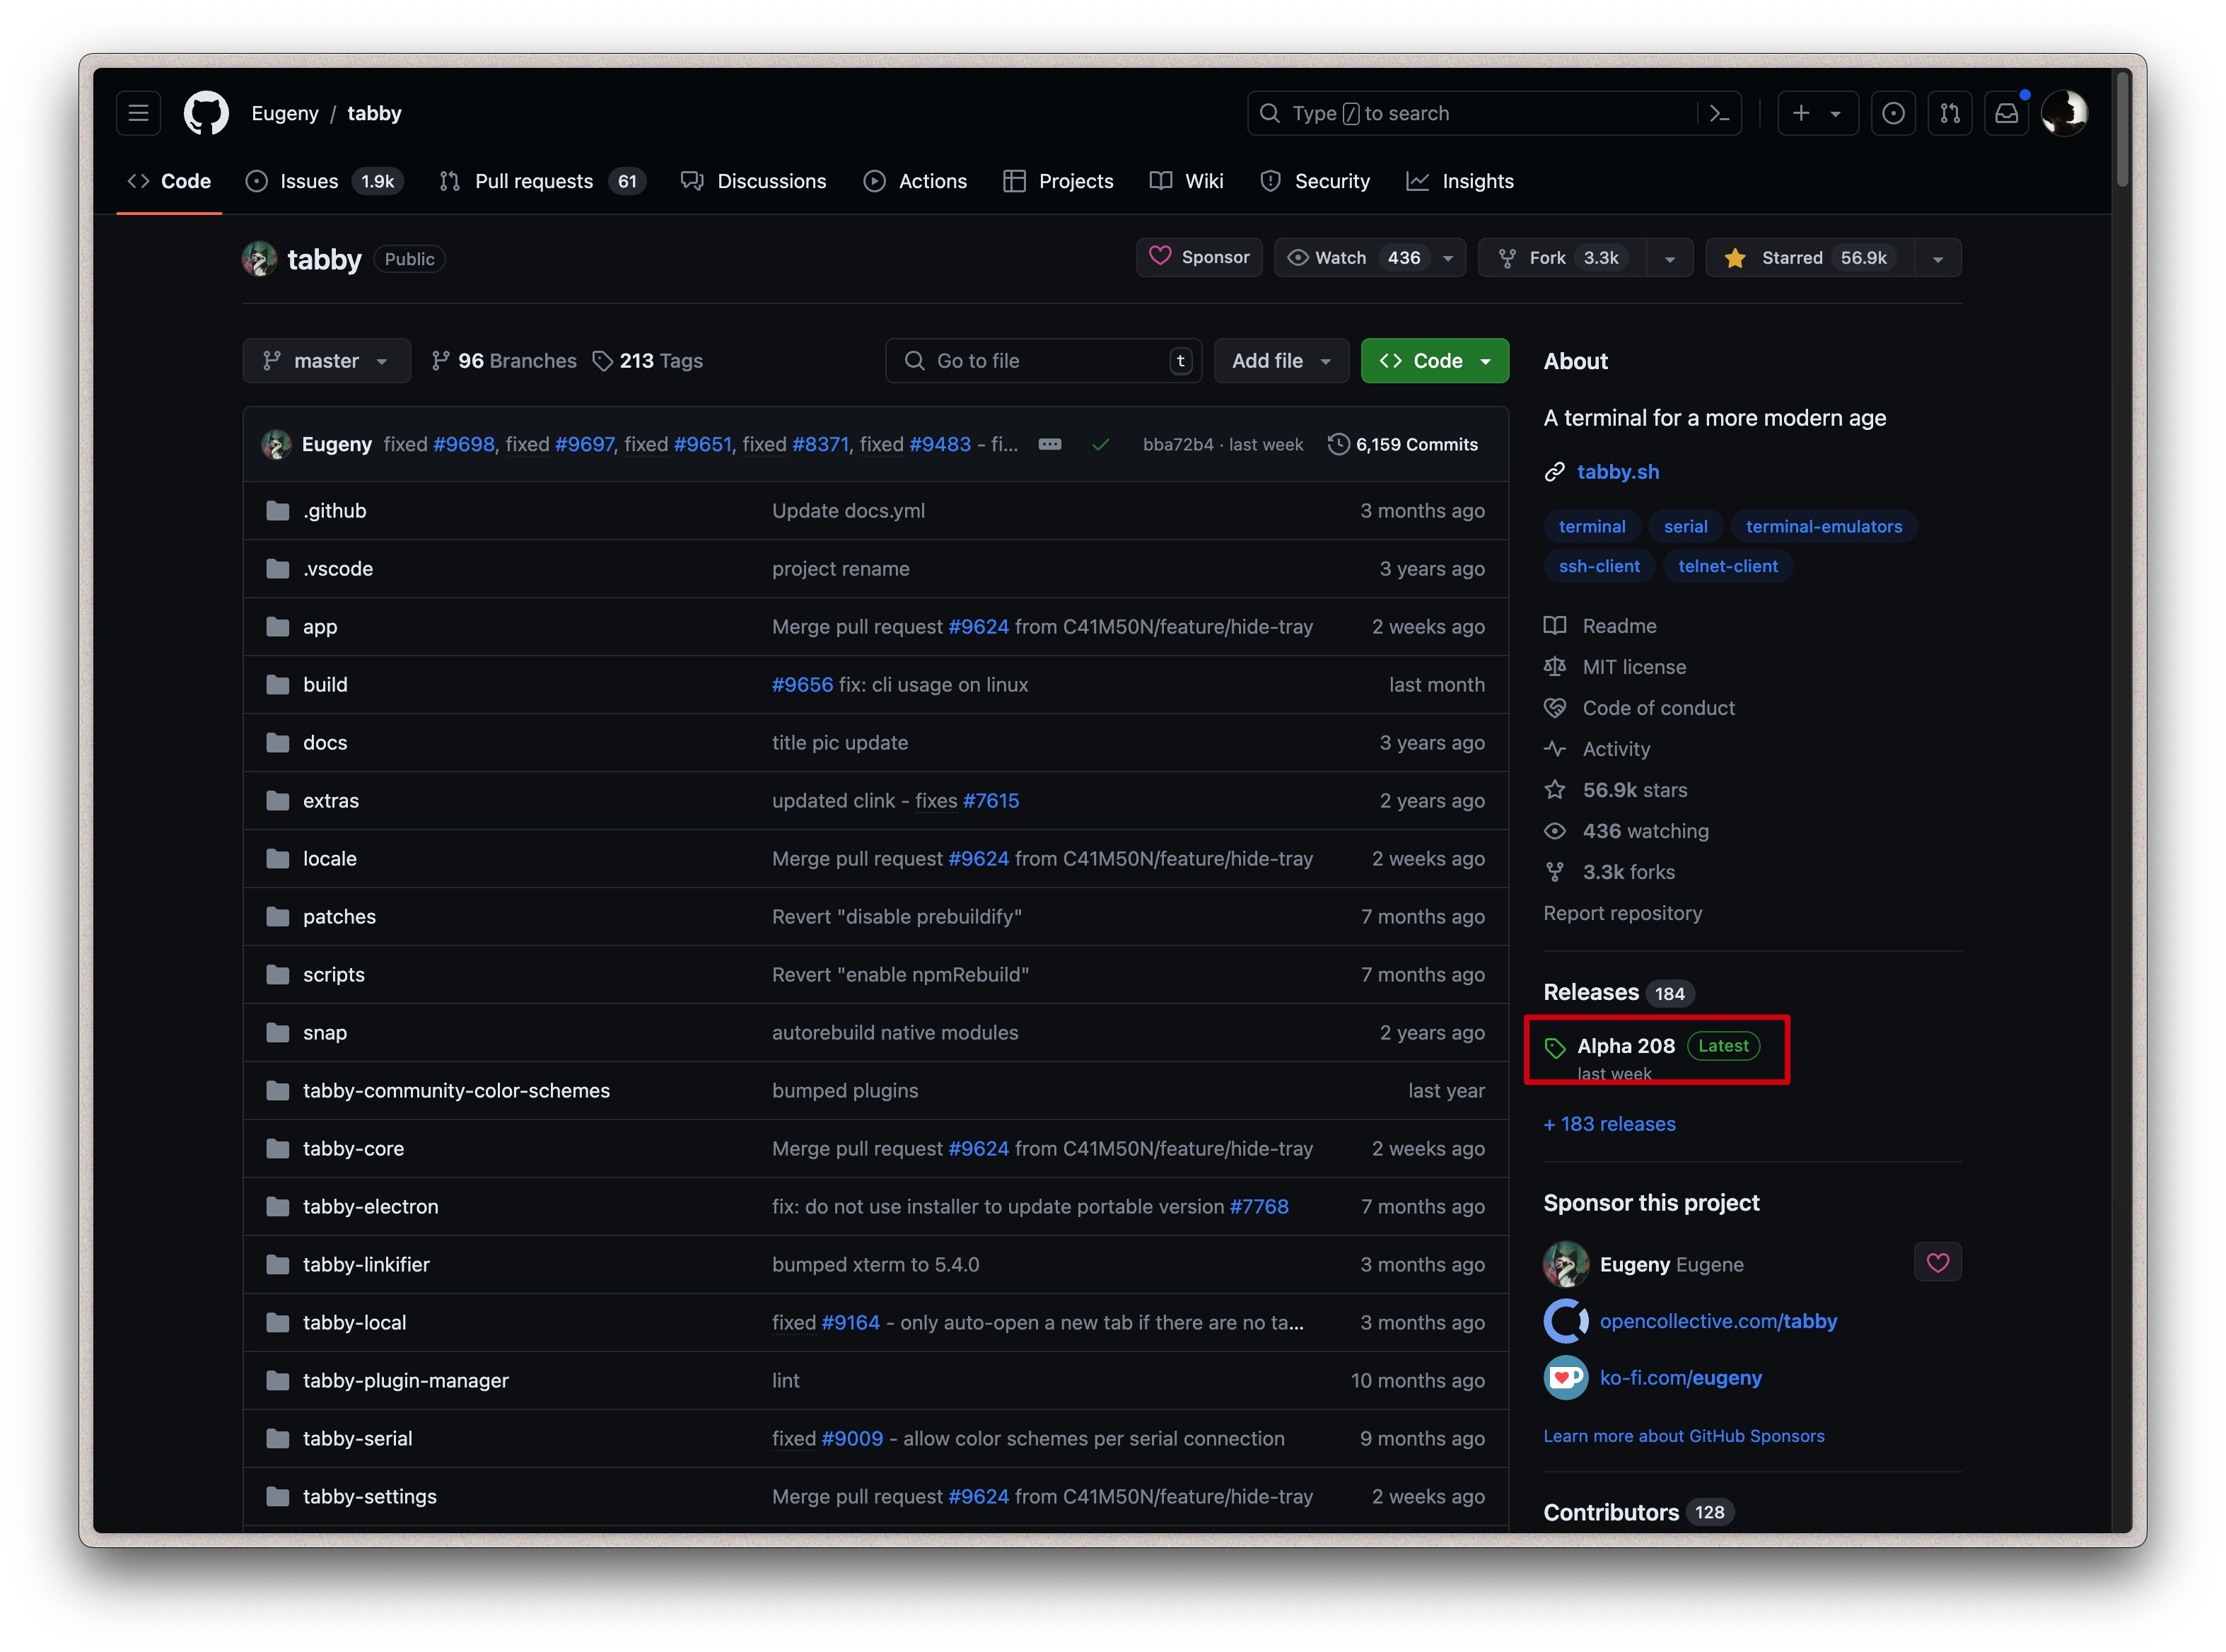
 选择对应的电脑系统下载就可以了
- Windows系统下载:
tabby-x-setup-x64.exe - Mac系统M1芯片下载:
tabby-x-macos-arm64.dmg。
下载安装后进入配置 👇 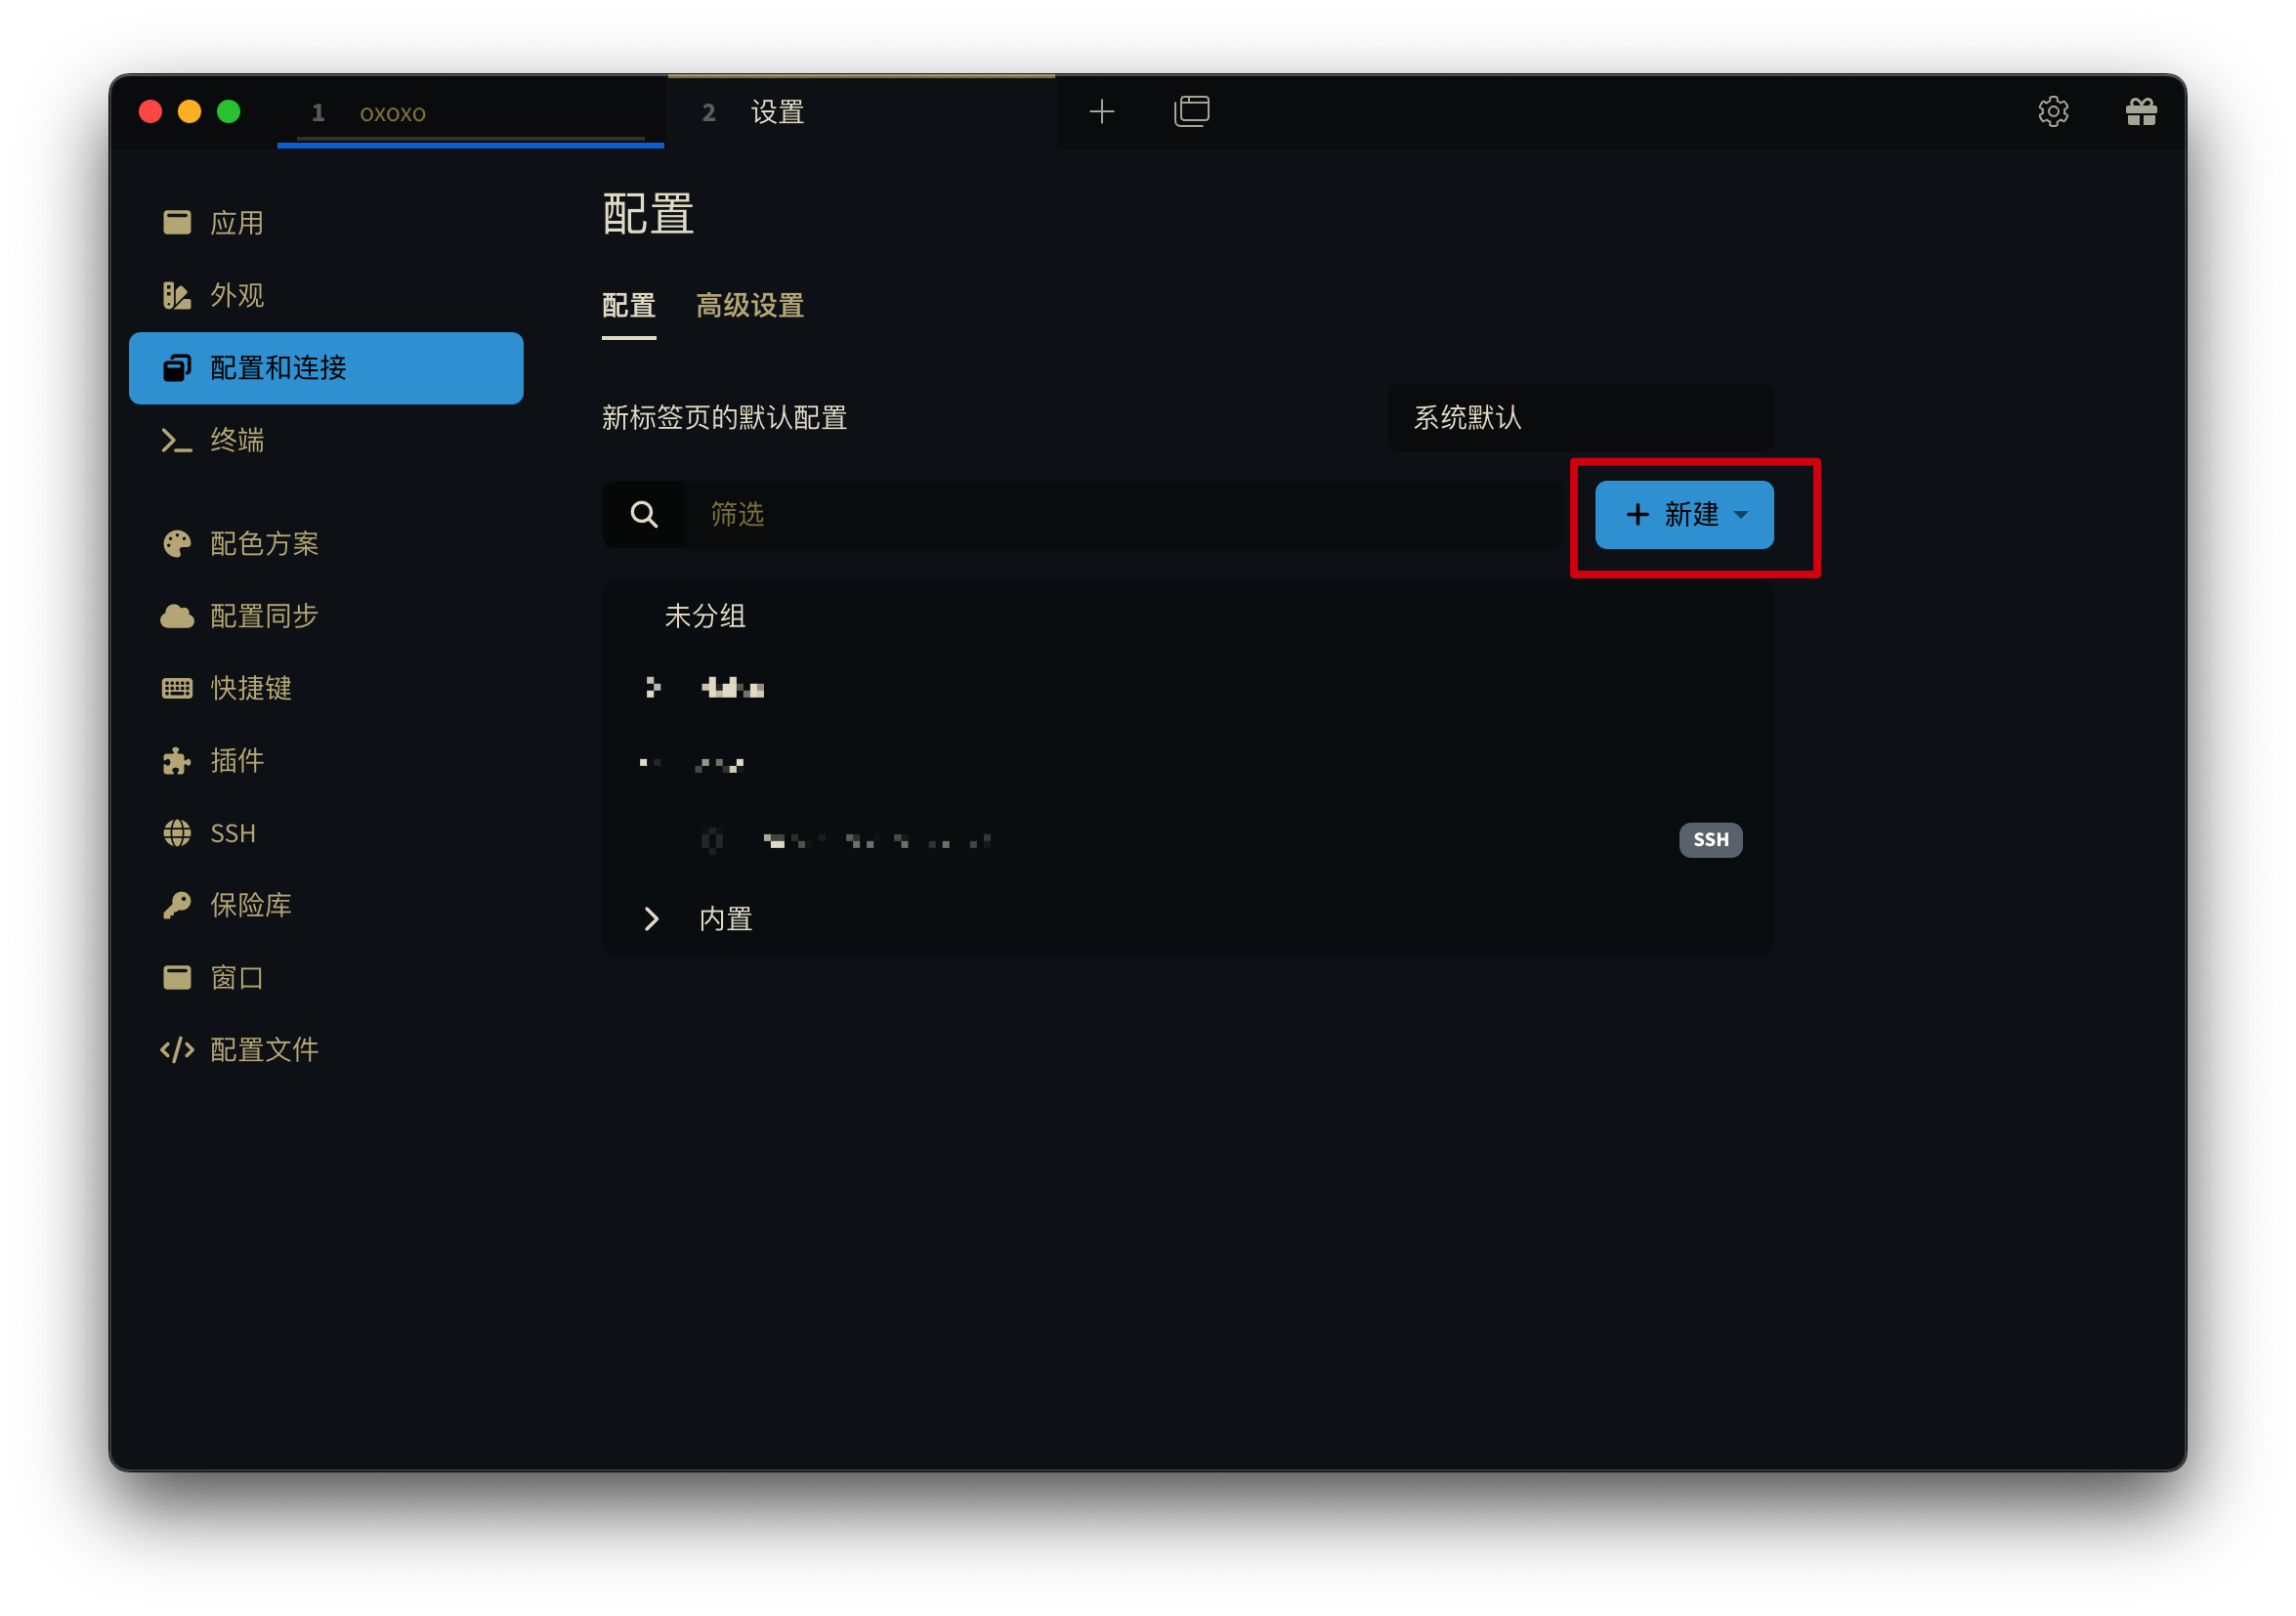 选择SSH连接
 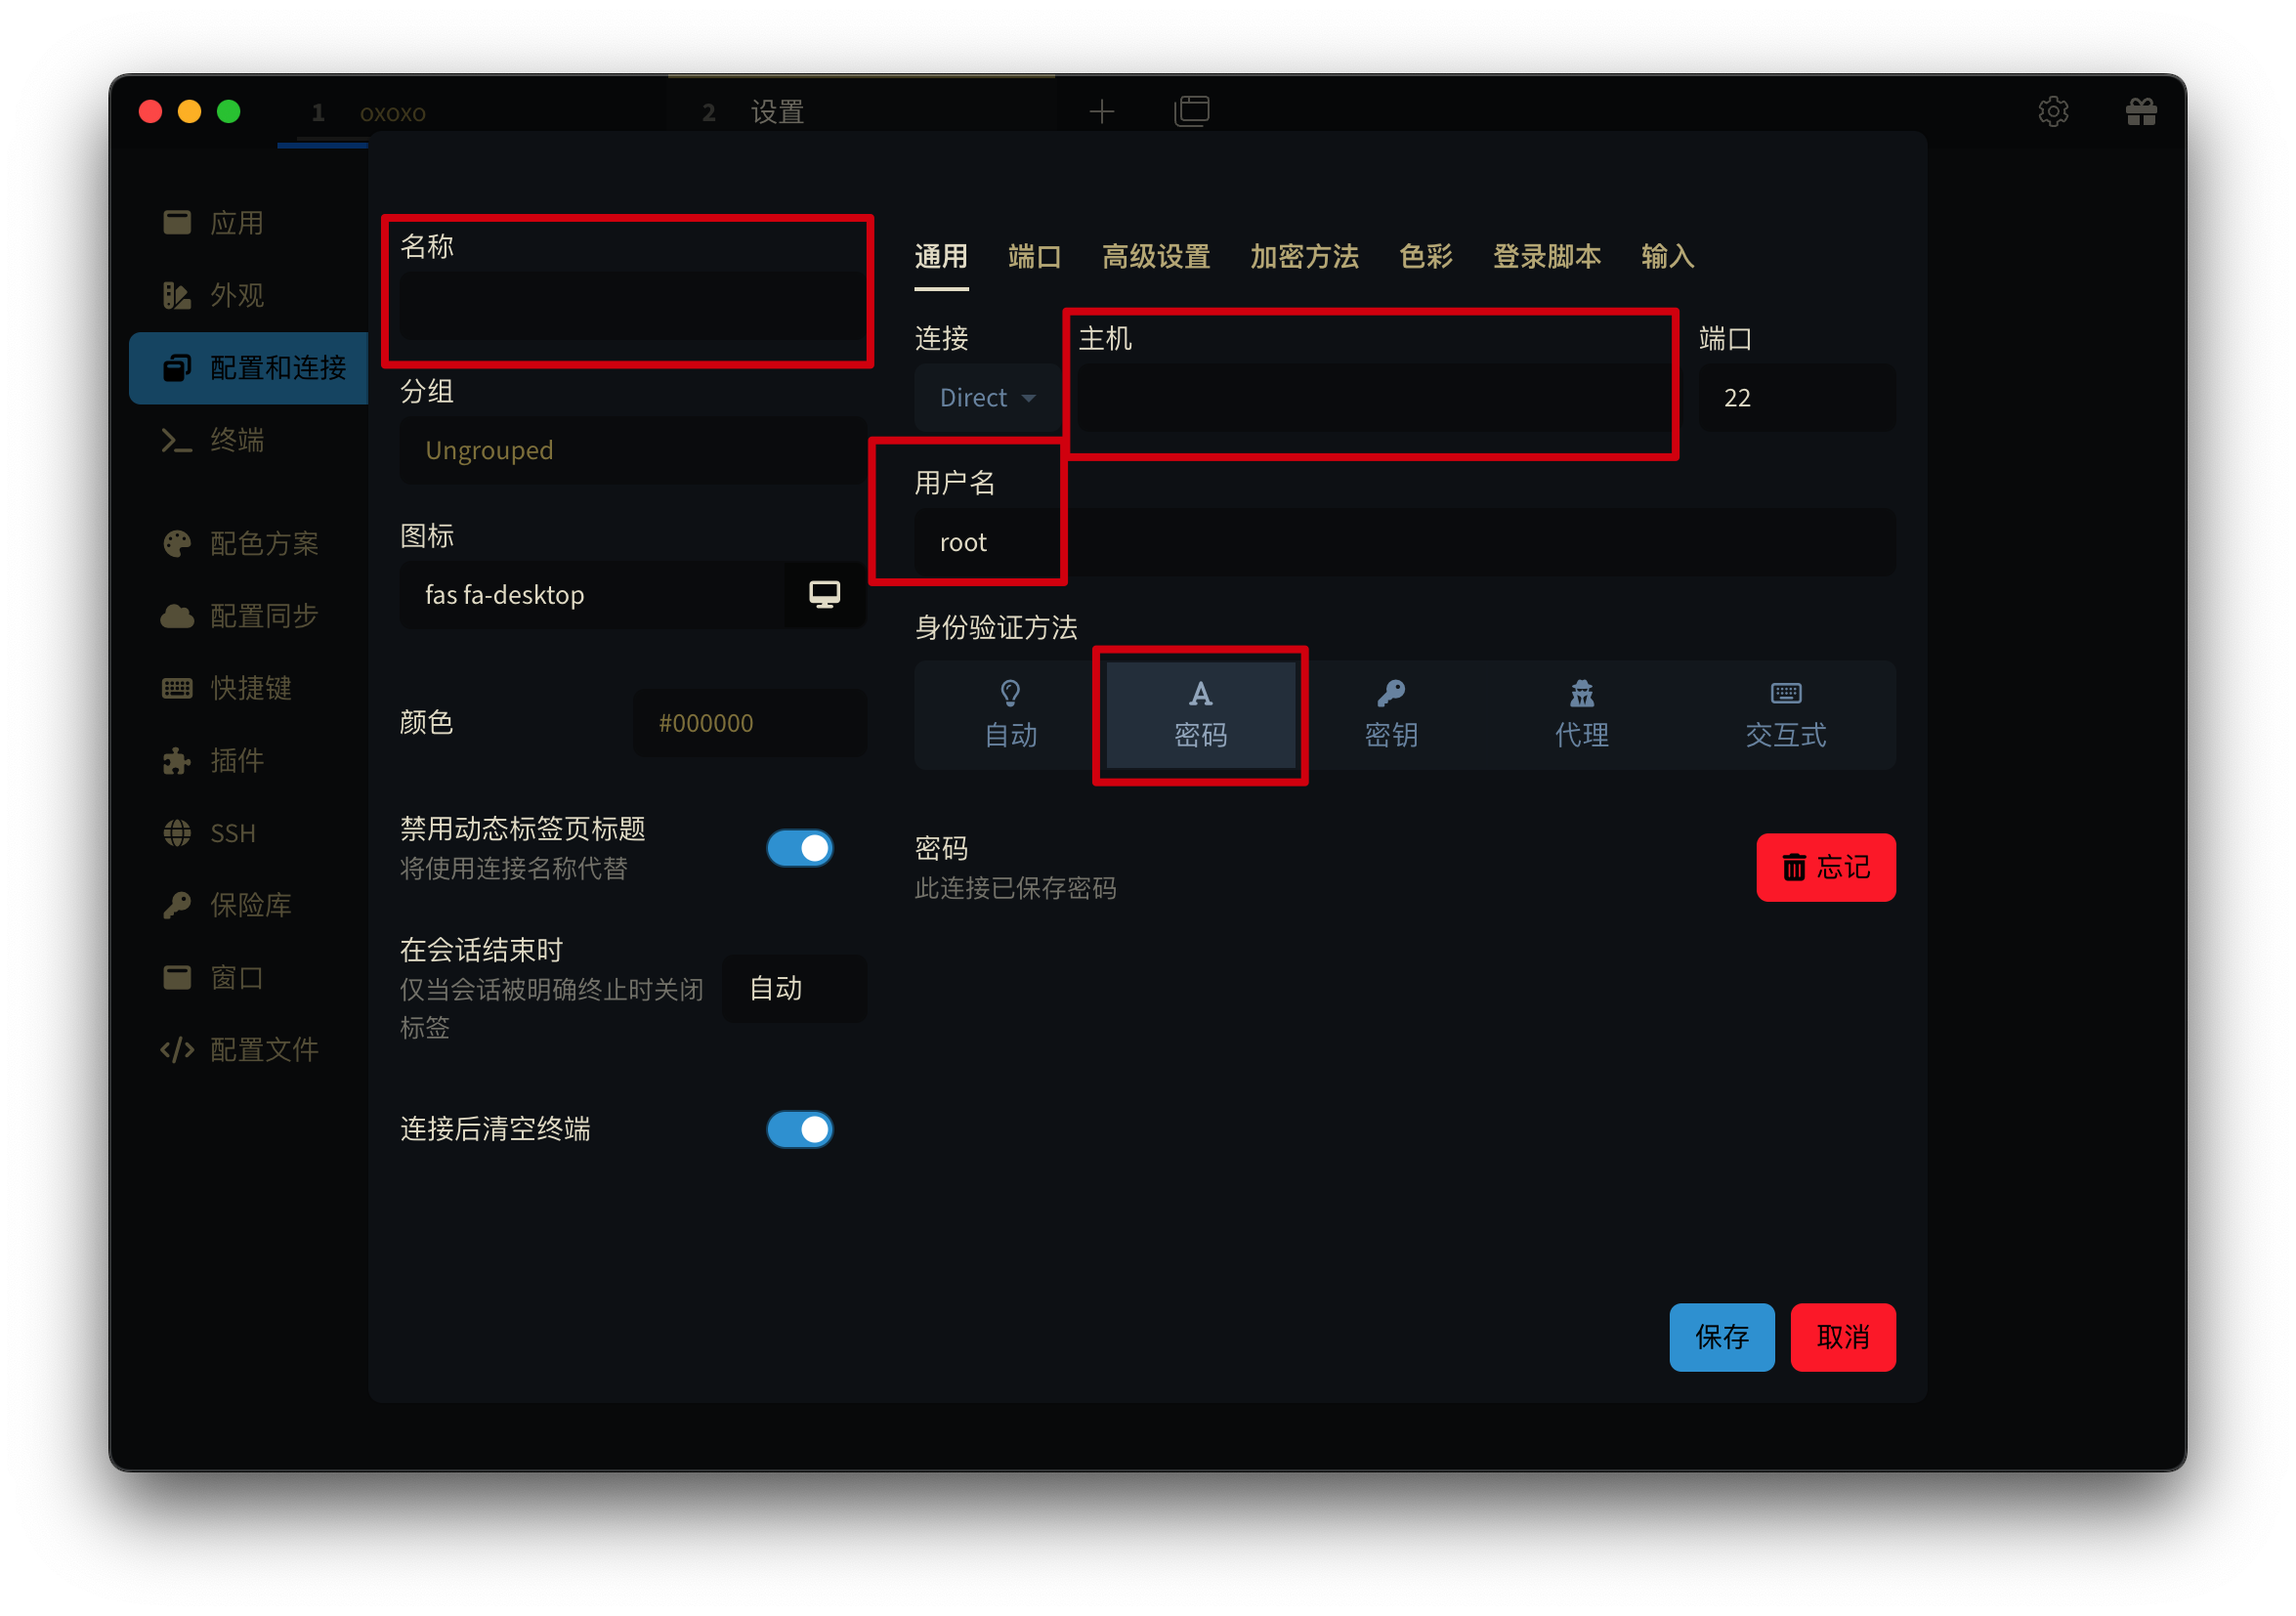 填写刚买的服务器的信息,默认端口是22,其实就和登录QQ一样简单。
随后双击登录,只要账号密码不出错,我们就可以连接上这台服务器了
然后在这个服务器上安装 WireGuard 了。
【服务端】安装 WireGuard #
首先在服务器上输入更新包指令:它可以帮助我们获取最新的软件包。
- 更新包:
sudo apt update - 安装 WireGuard:
sudo apt install wireguard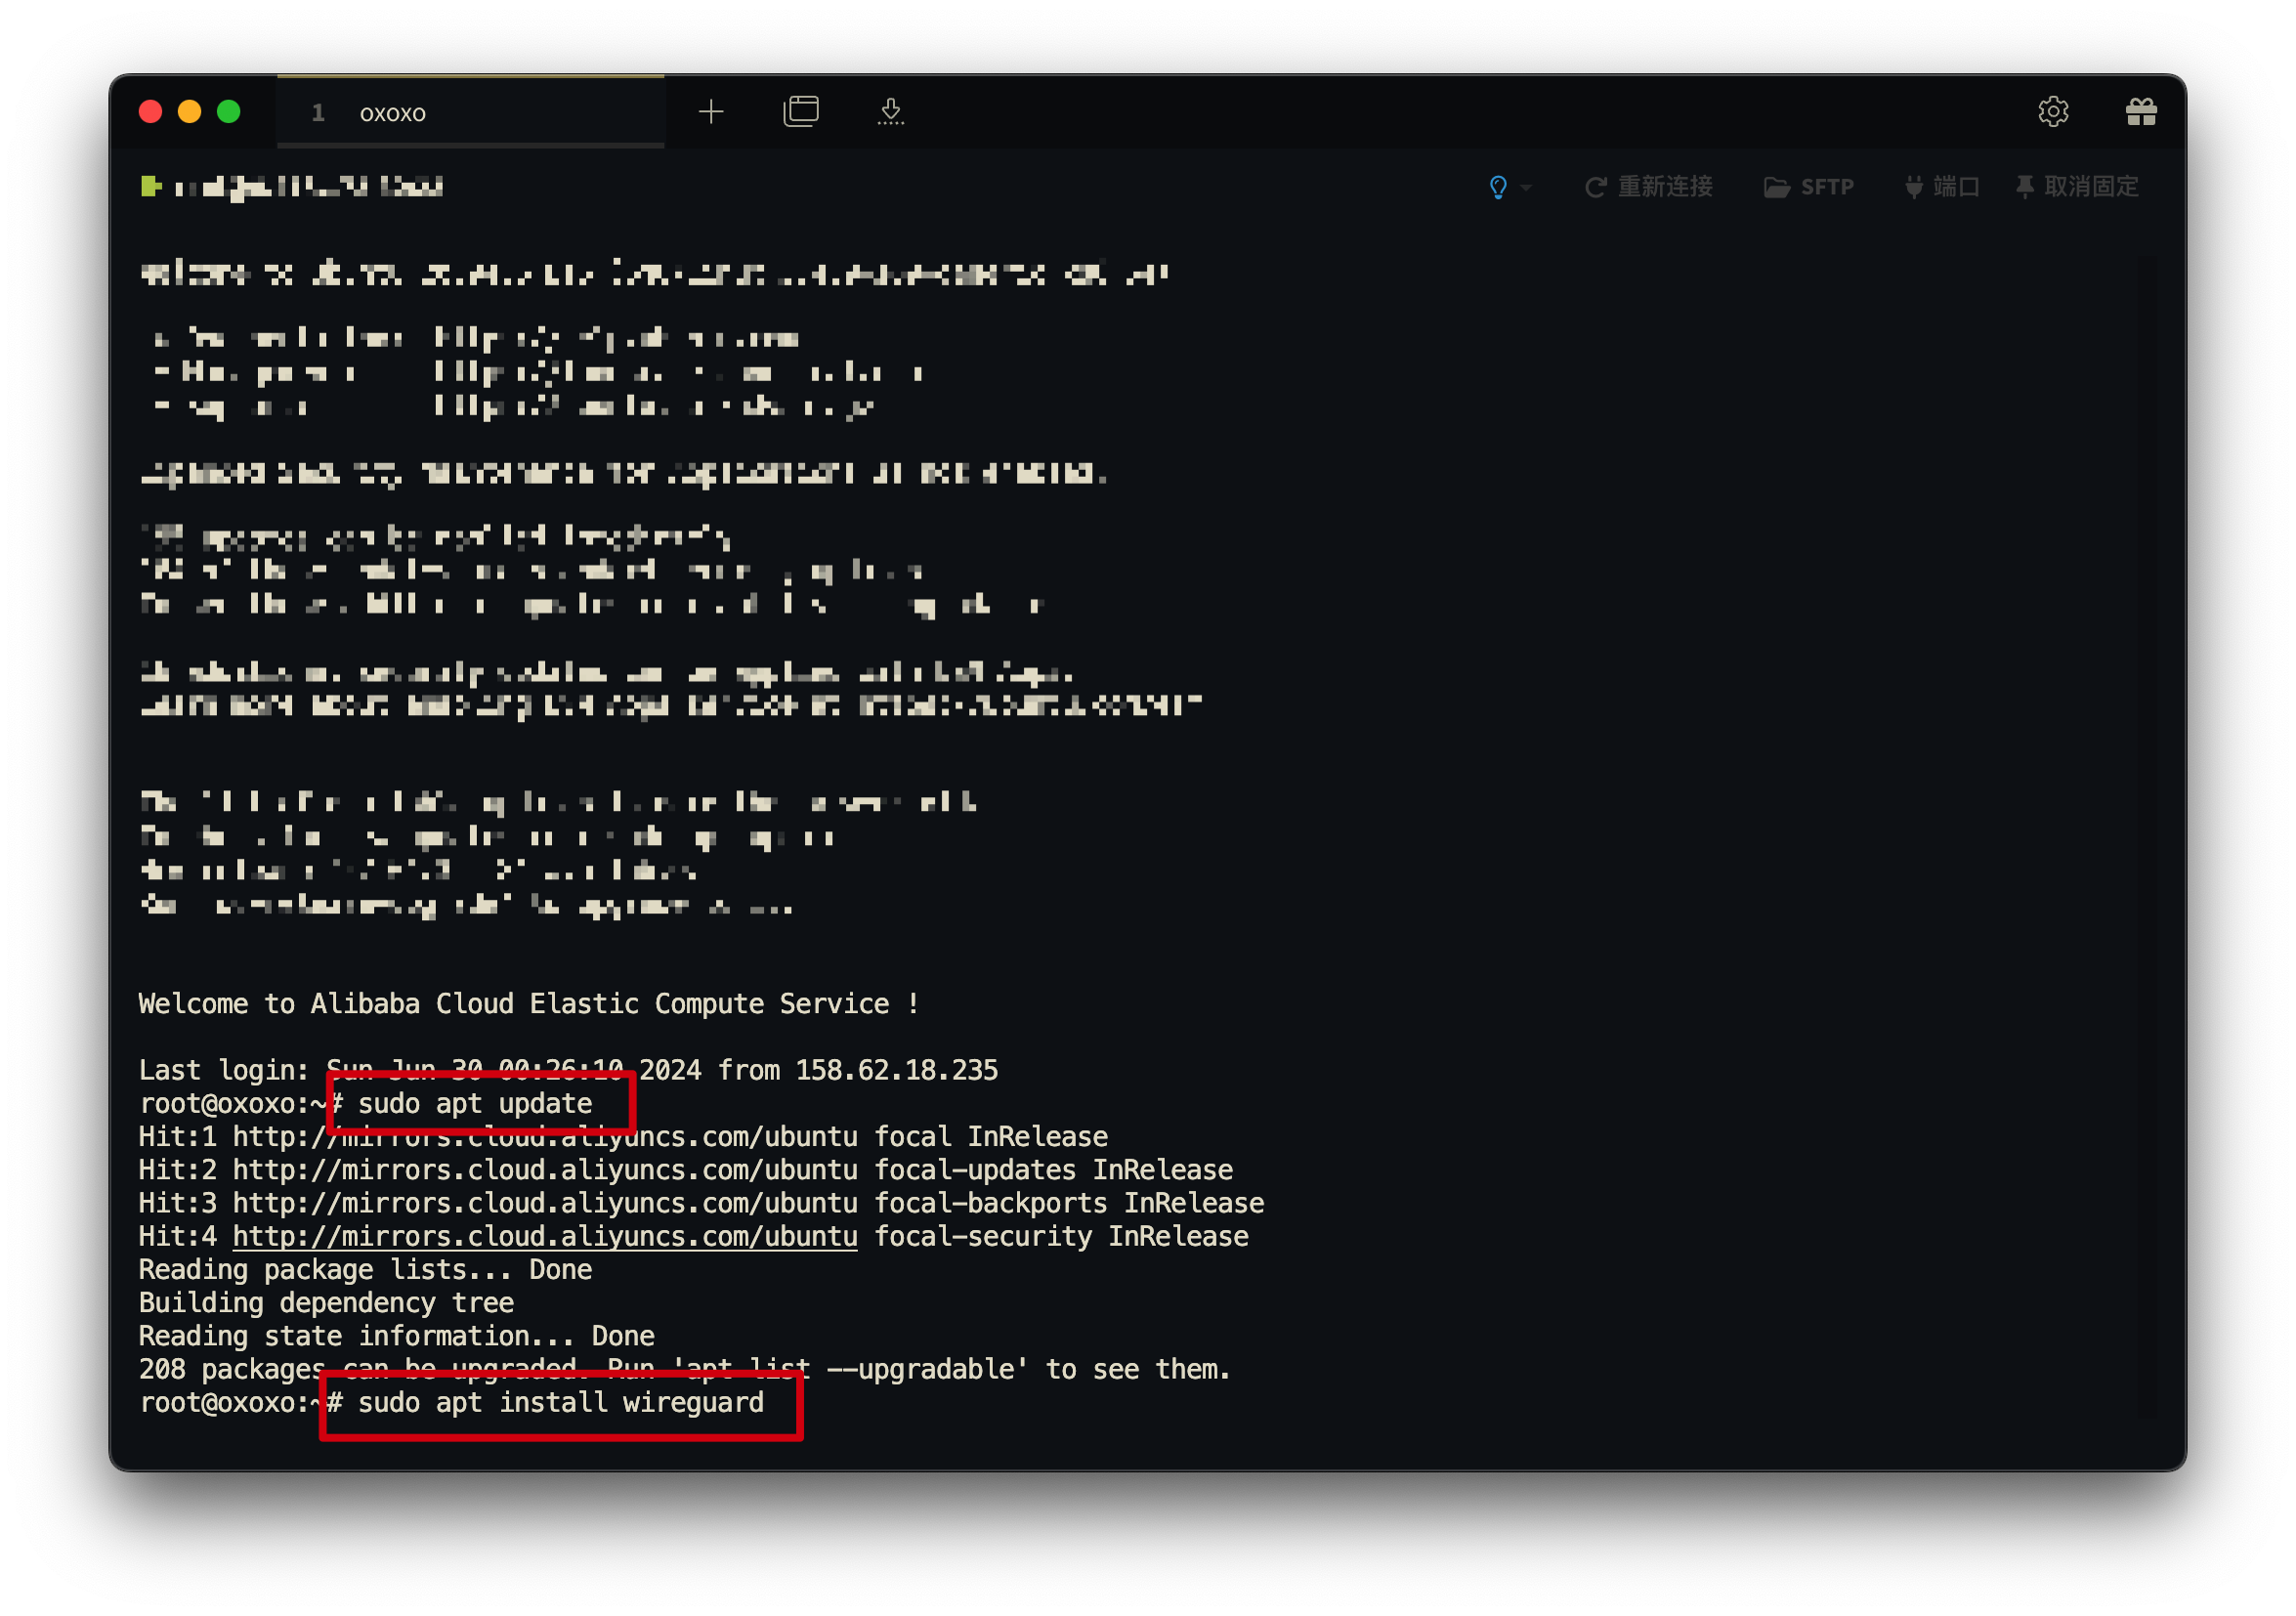
以下是一些常用的指令,来控制 WireGuard 的运行:
- 启动:
sudo wg-quick up wg0 - 停止:
sudo wg-quick down wg0 - 状态:
sudo wg show
开启端口转发 #
确保启用IP转发,编辑 /etc/sysctl.conf 文件,添加或取消注释以下行:
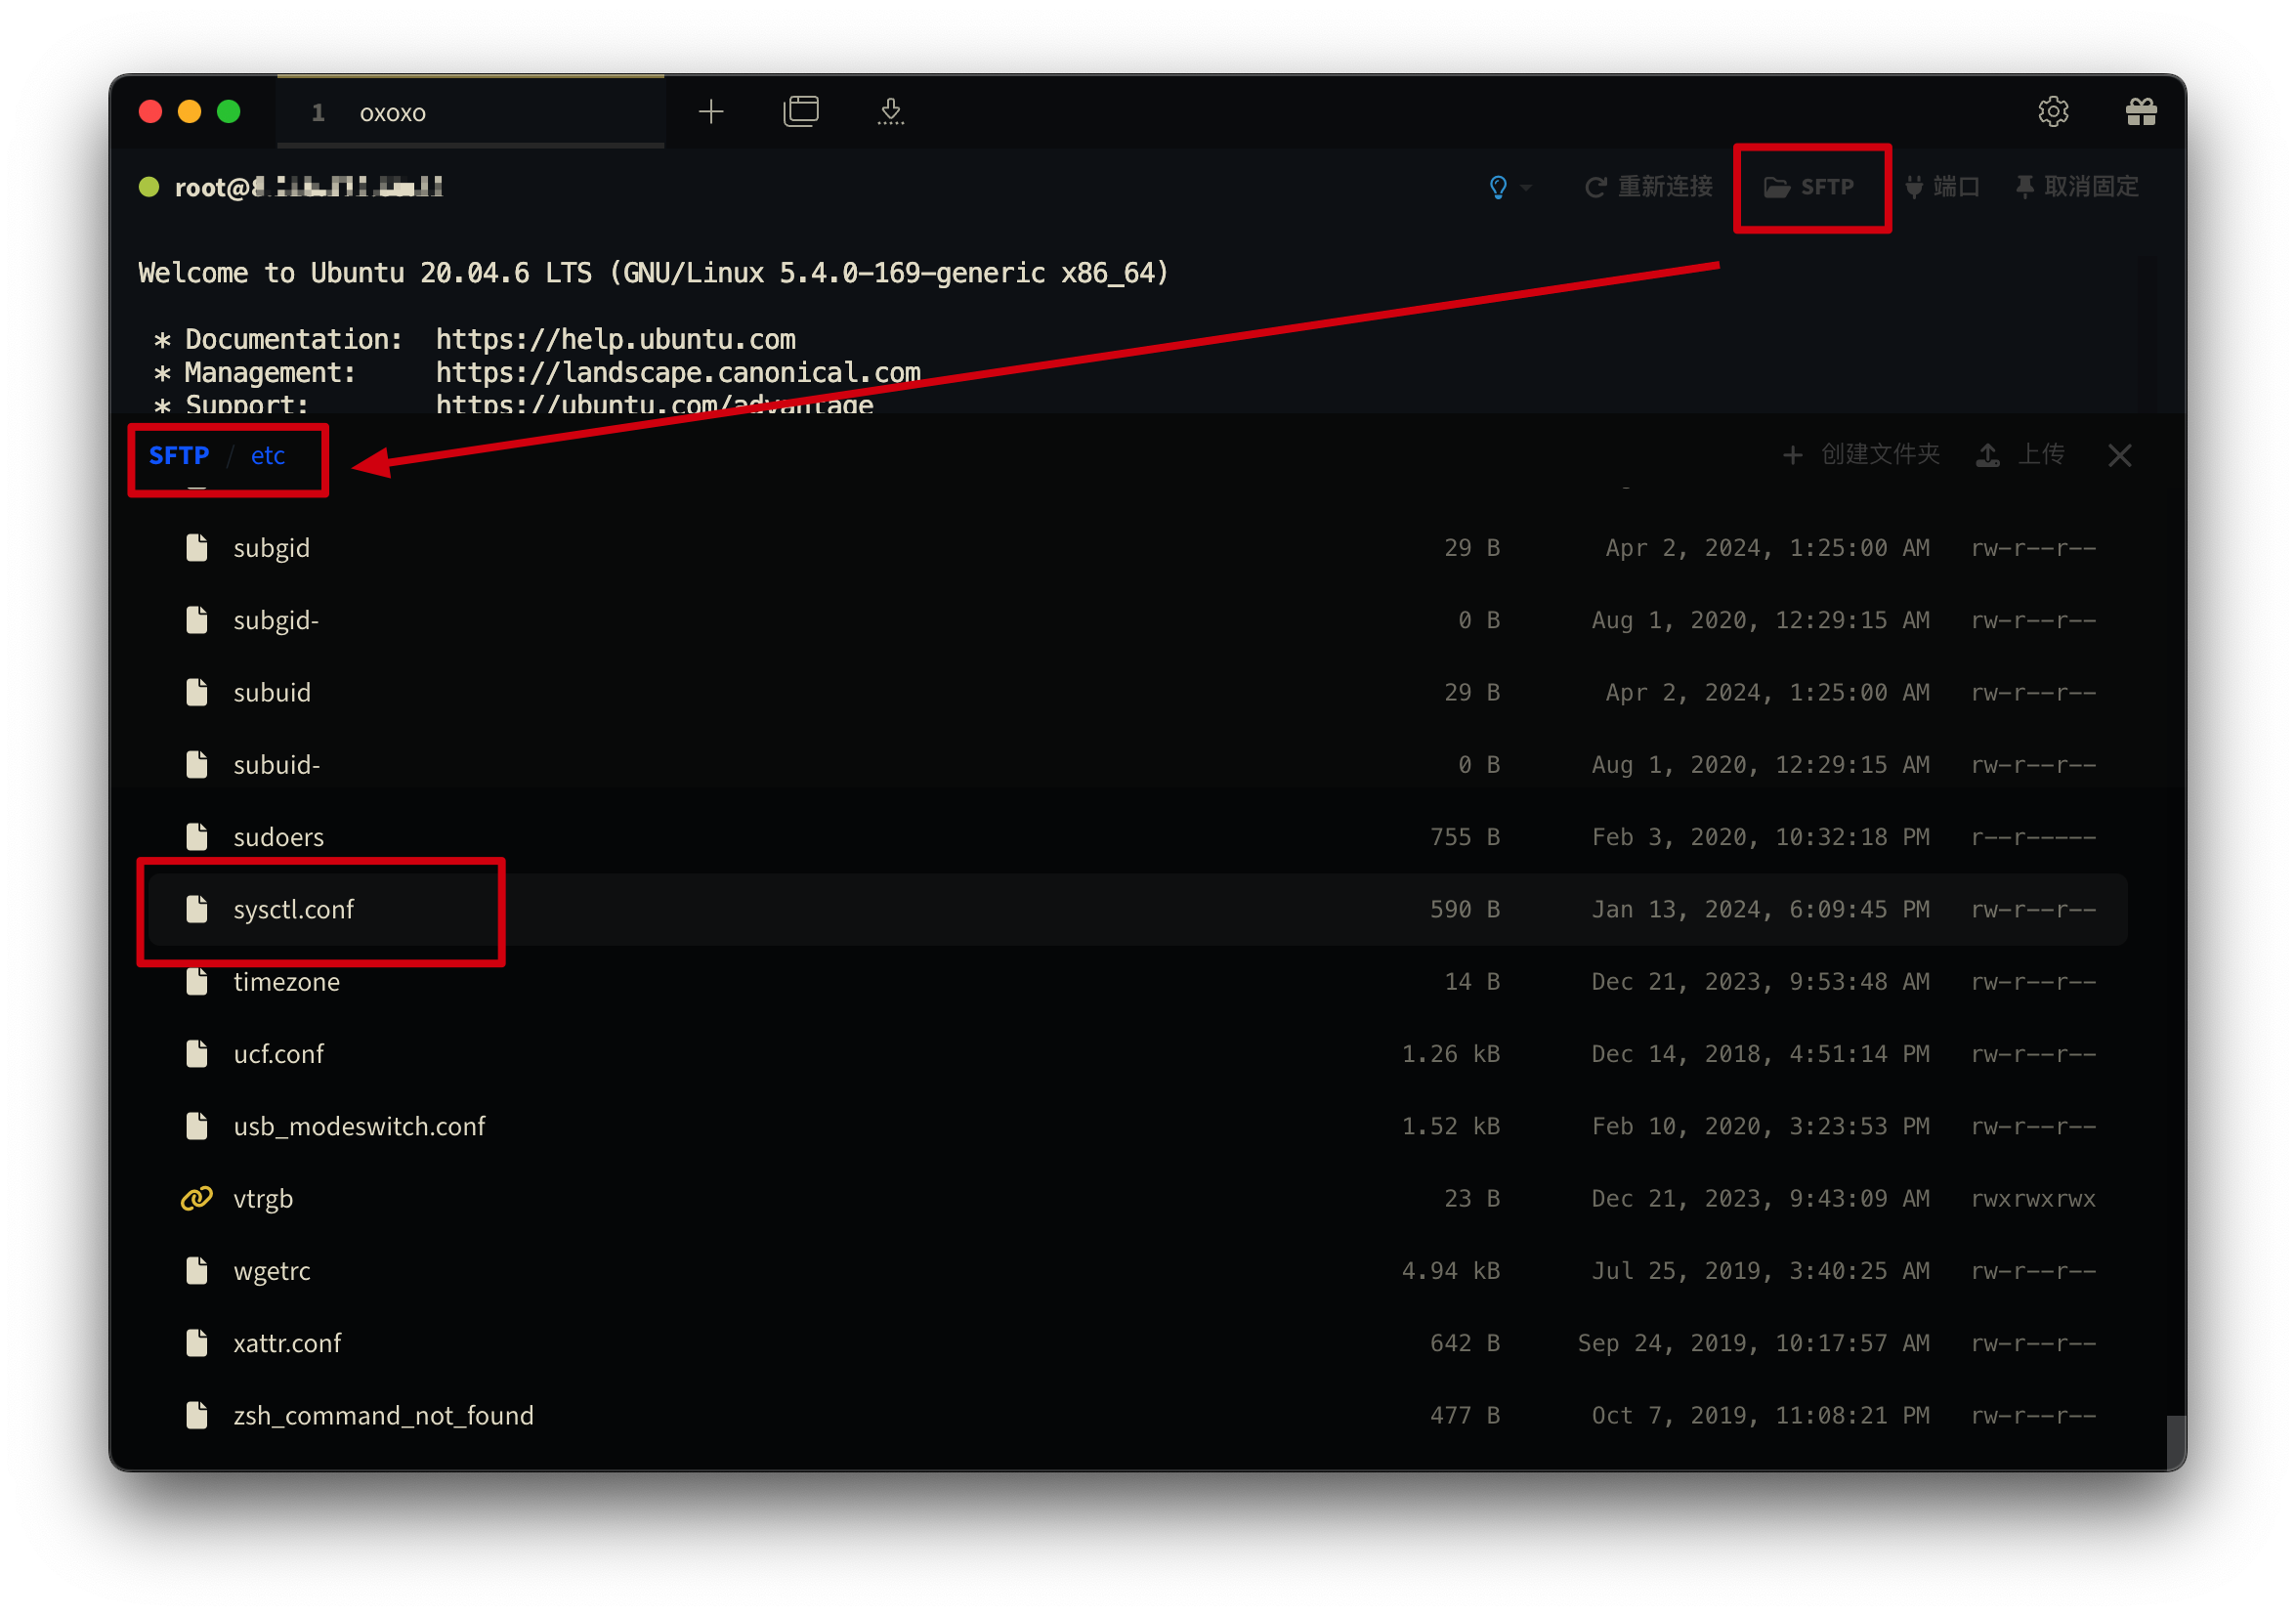 使用 Tabby 可以右键这个服务器上的文件,在本地编辑。
net.ipv4.ip_forward=1
net.ipv6.conf.all.forwarding=1
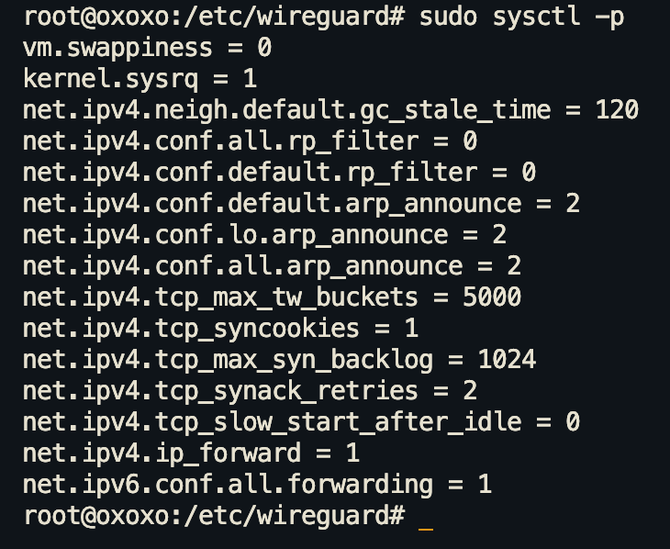
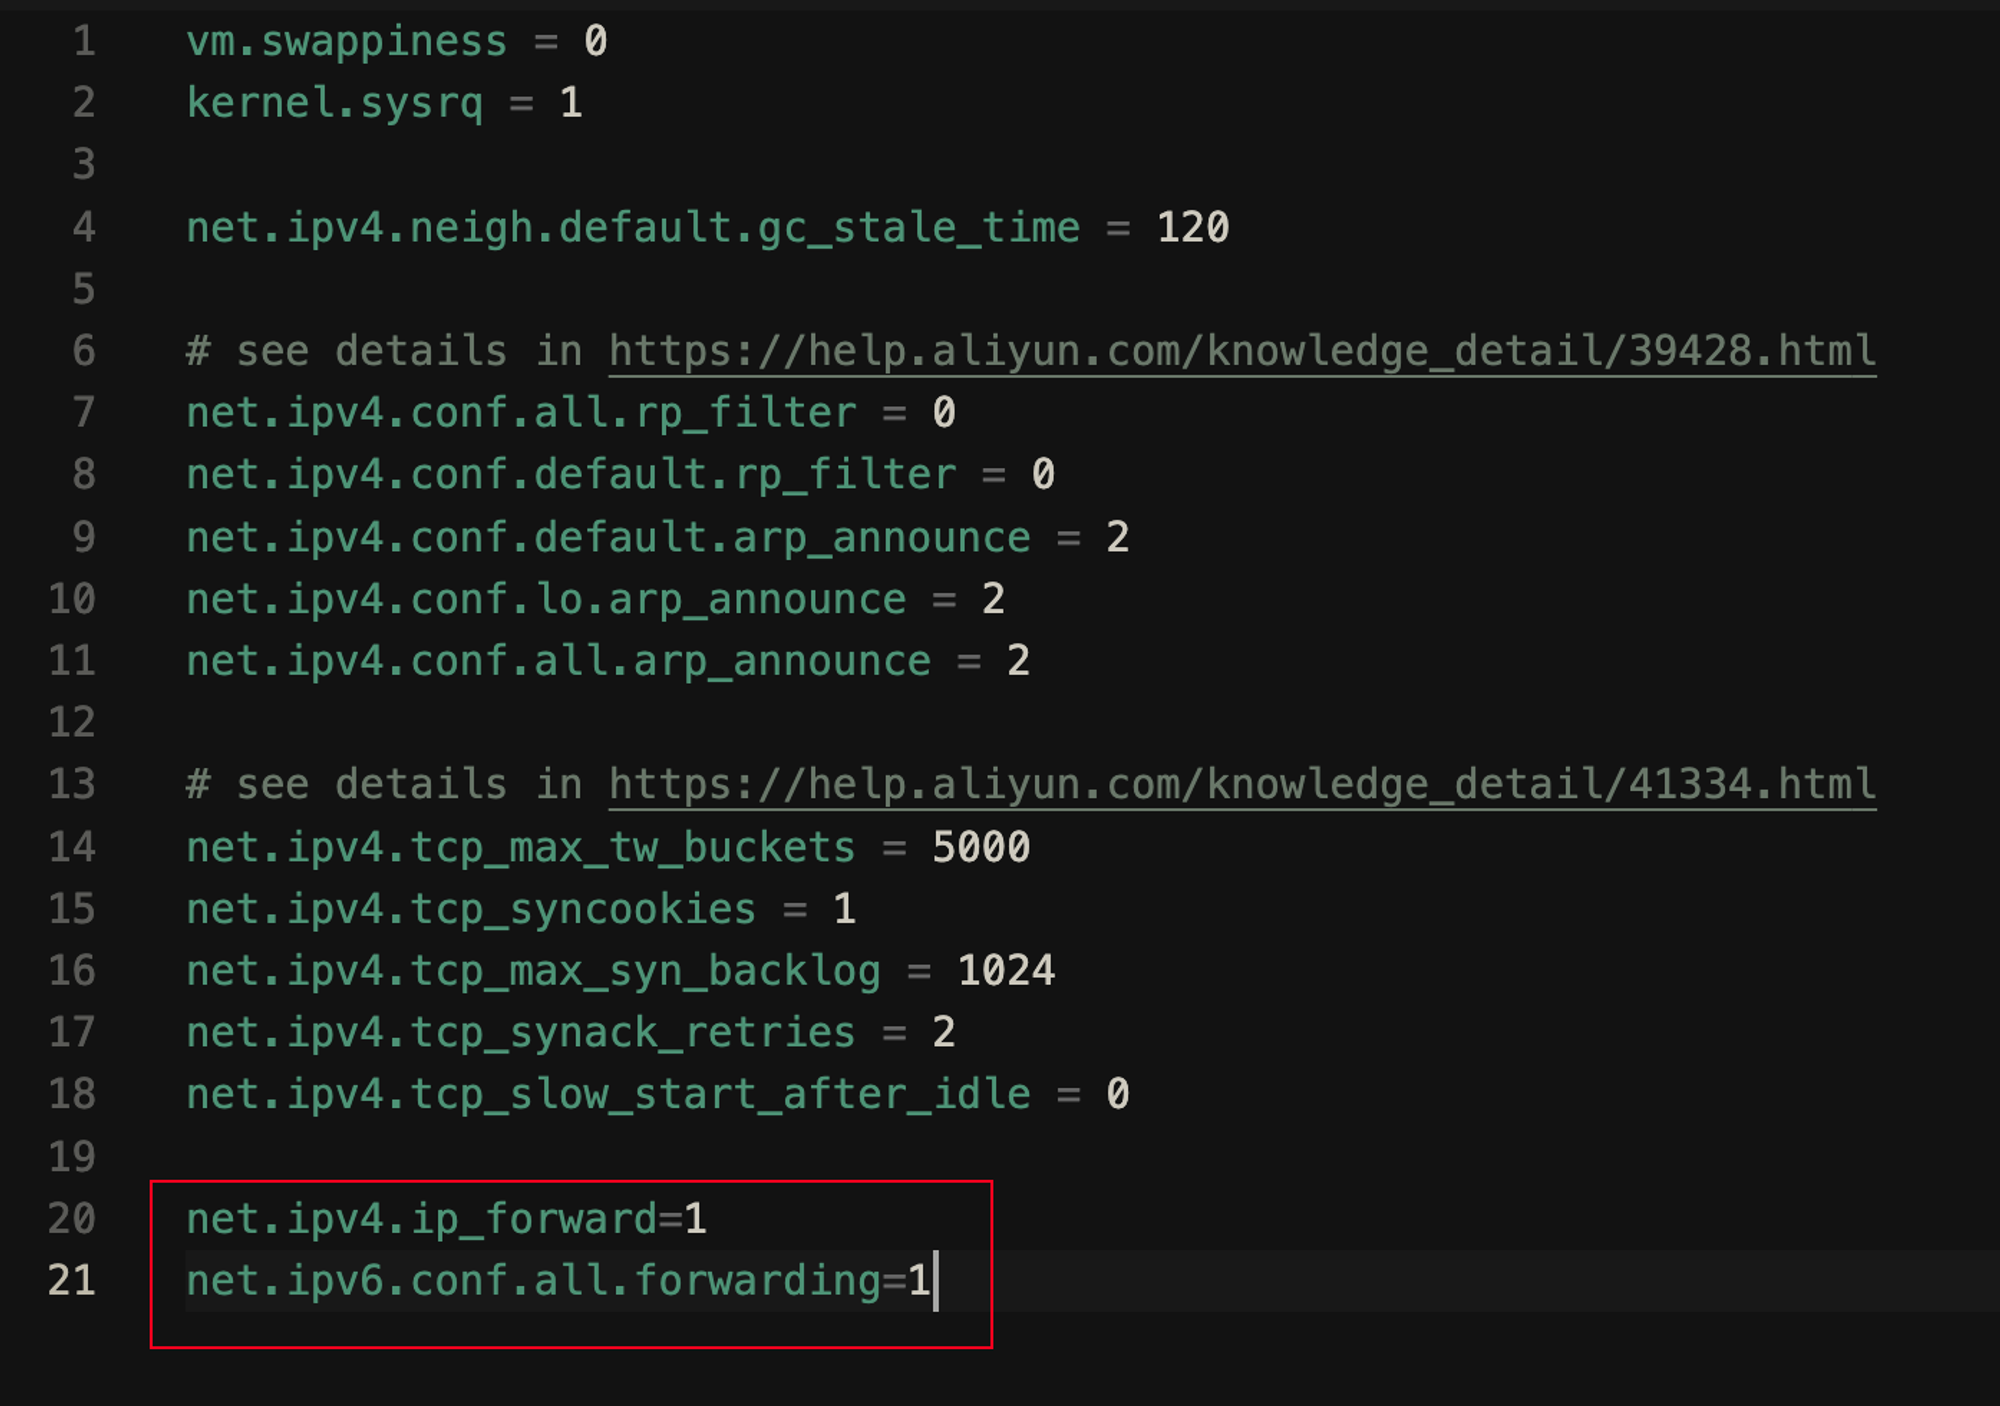 修改完后,保存退出,然后执行以下指令使设置生效:
sudo sysctl -p
给 WireGuard 足够的权限 #
用 cd 进入到安装了 WireGuard 的目录,然后执行以下命令:
cd /etc/wireguard/
chmod 0777 /etc/wireguard

# 调整目录默认权限
umask 077
生成【服务端】密钥对: #
进入到安装了 WireGuard 的目录,然后执行以下命令:
cd /etc/wireguard/
wg genkey | tee privatekey | wg pubkey > publickey
这将会创建一个名为:privatekey 文件和 publickey 文件在当前文件夹下
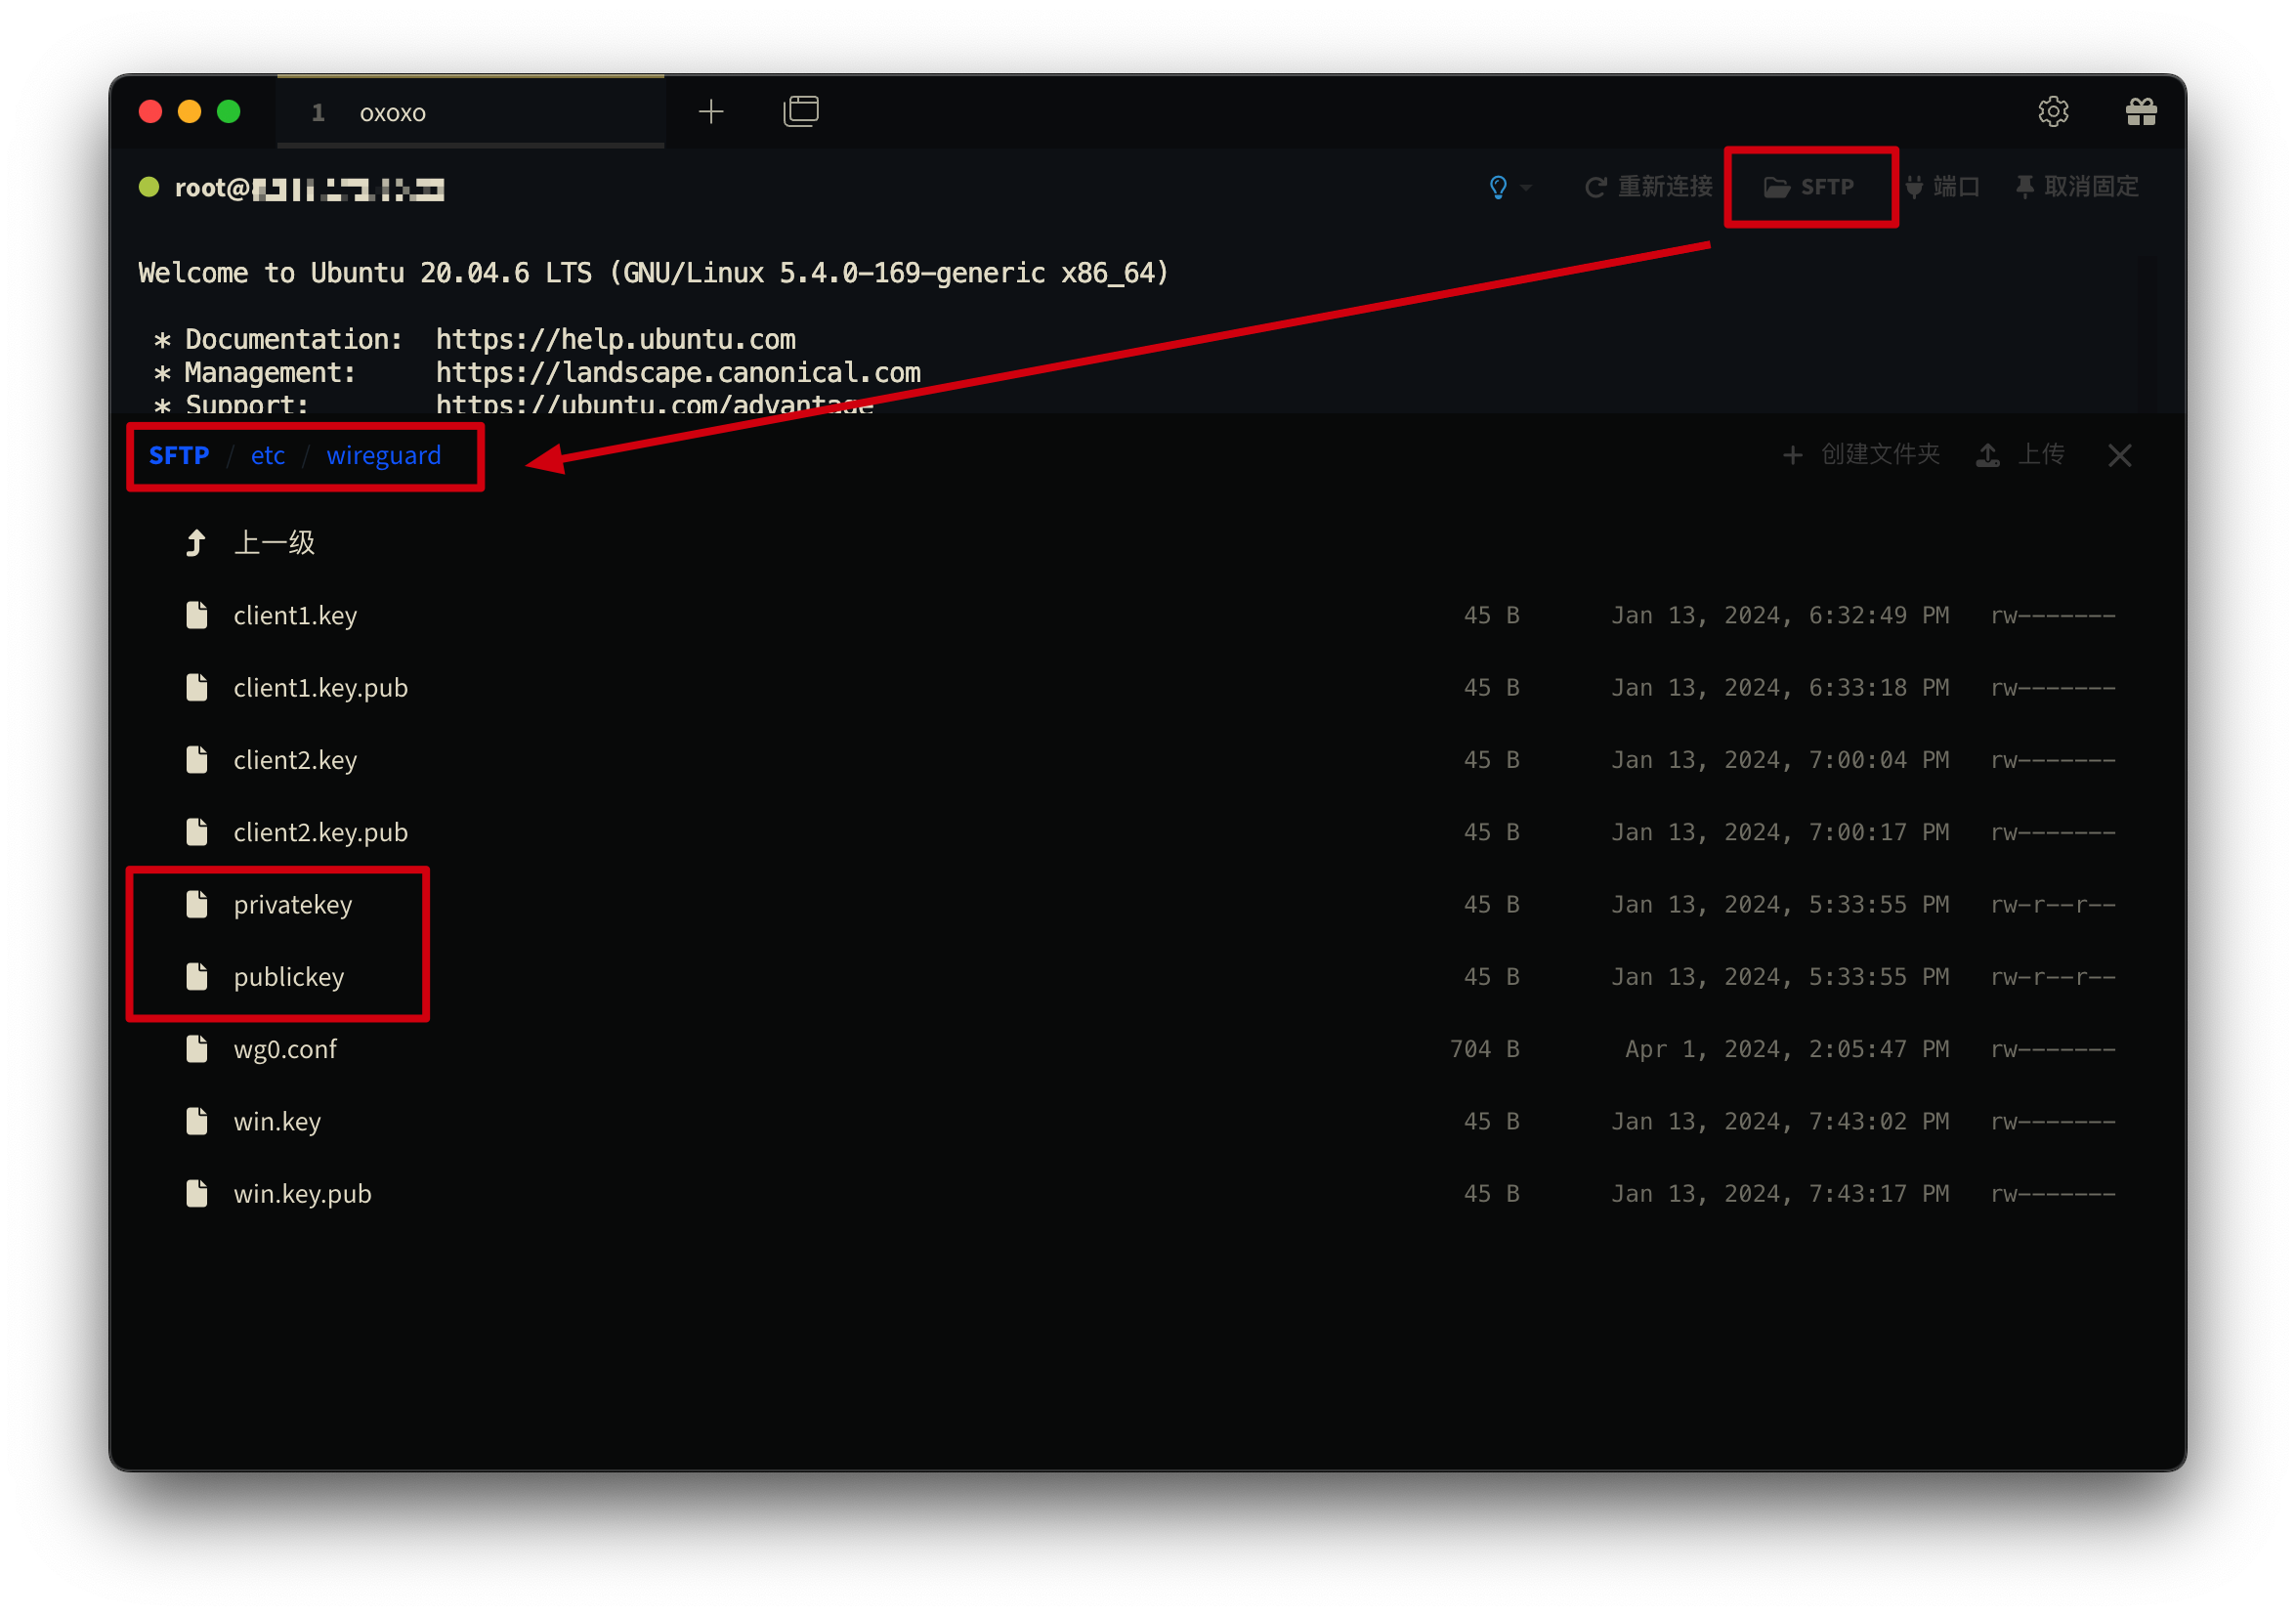
- 查看【服务器】私钥:
cat privatekey - 查看【服务器】公钥:
cat publickey
生成【客户端】密钥对: #
我们需要在服务器的 WireGuard处 生成客户端的公钥密钥
这个客户端也就是我们的本地电脑Mac,Windows,或者手机,需要安装 WireGuard 客户端软件,然后配置好服务器的 IP 和端口,然后导入服务器的公钥。
生成「客户端」密钥对:
#生成私钥
wg genkey > client1.key

# 通过私钥生成密钥
wg pubkey < client1.key > client1.key.pub
- 查看「客户端」私钥:
cat client1.key - 查看「客户端」公钥:
cat client1.key.pub
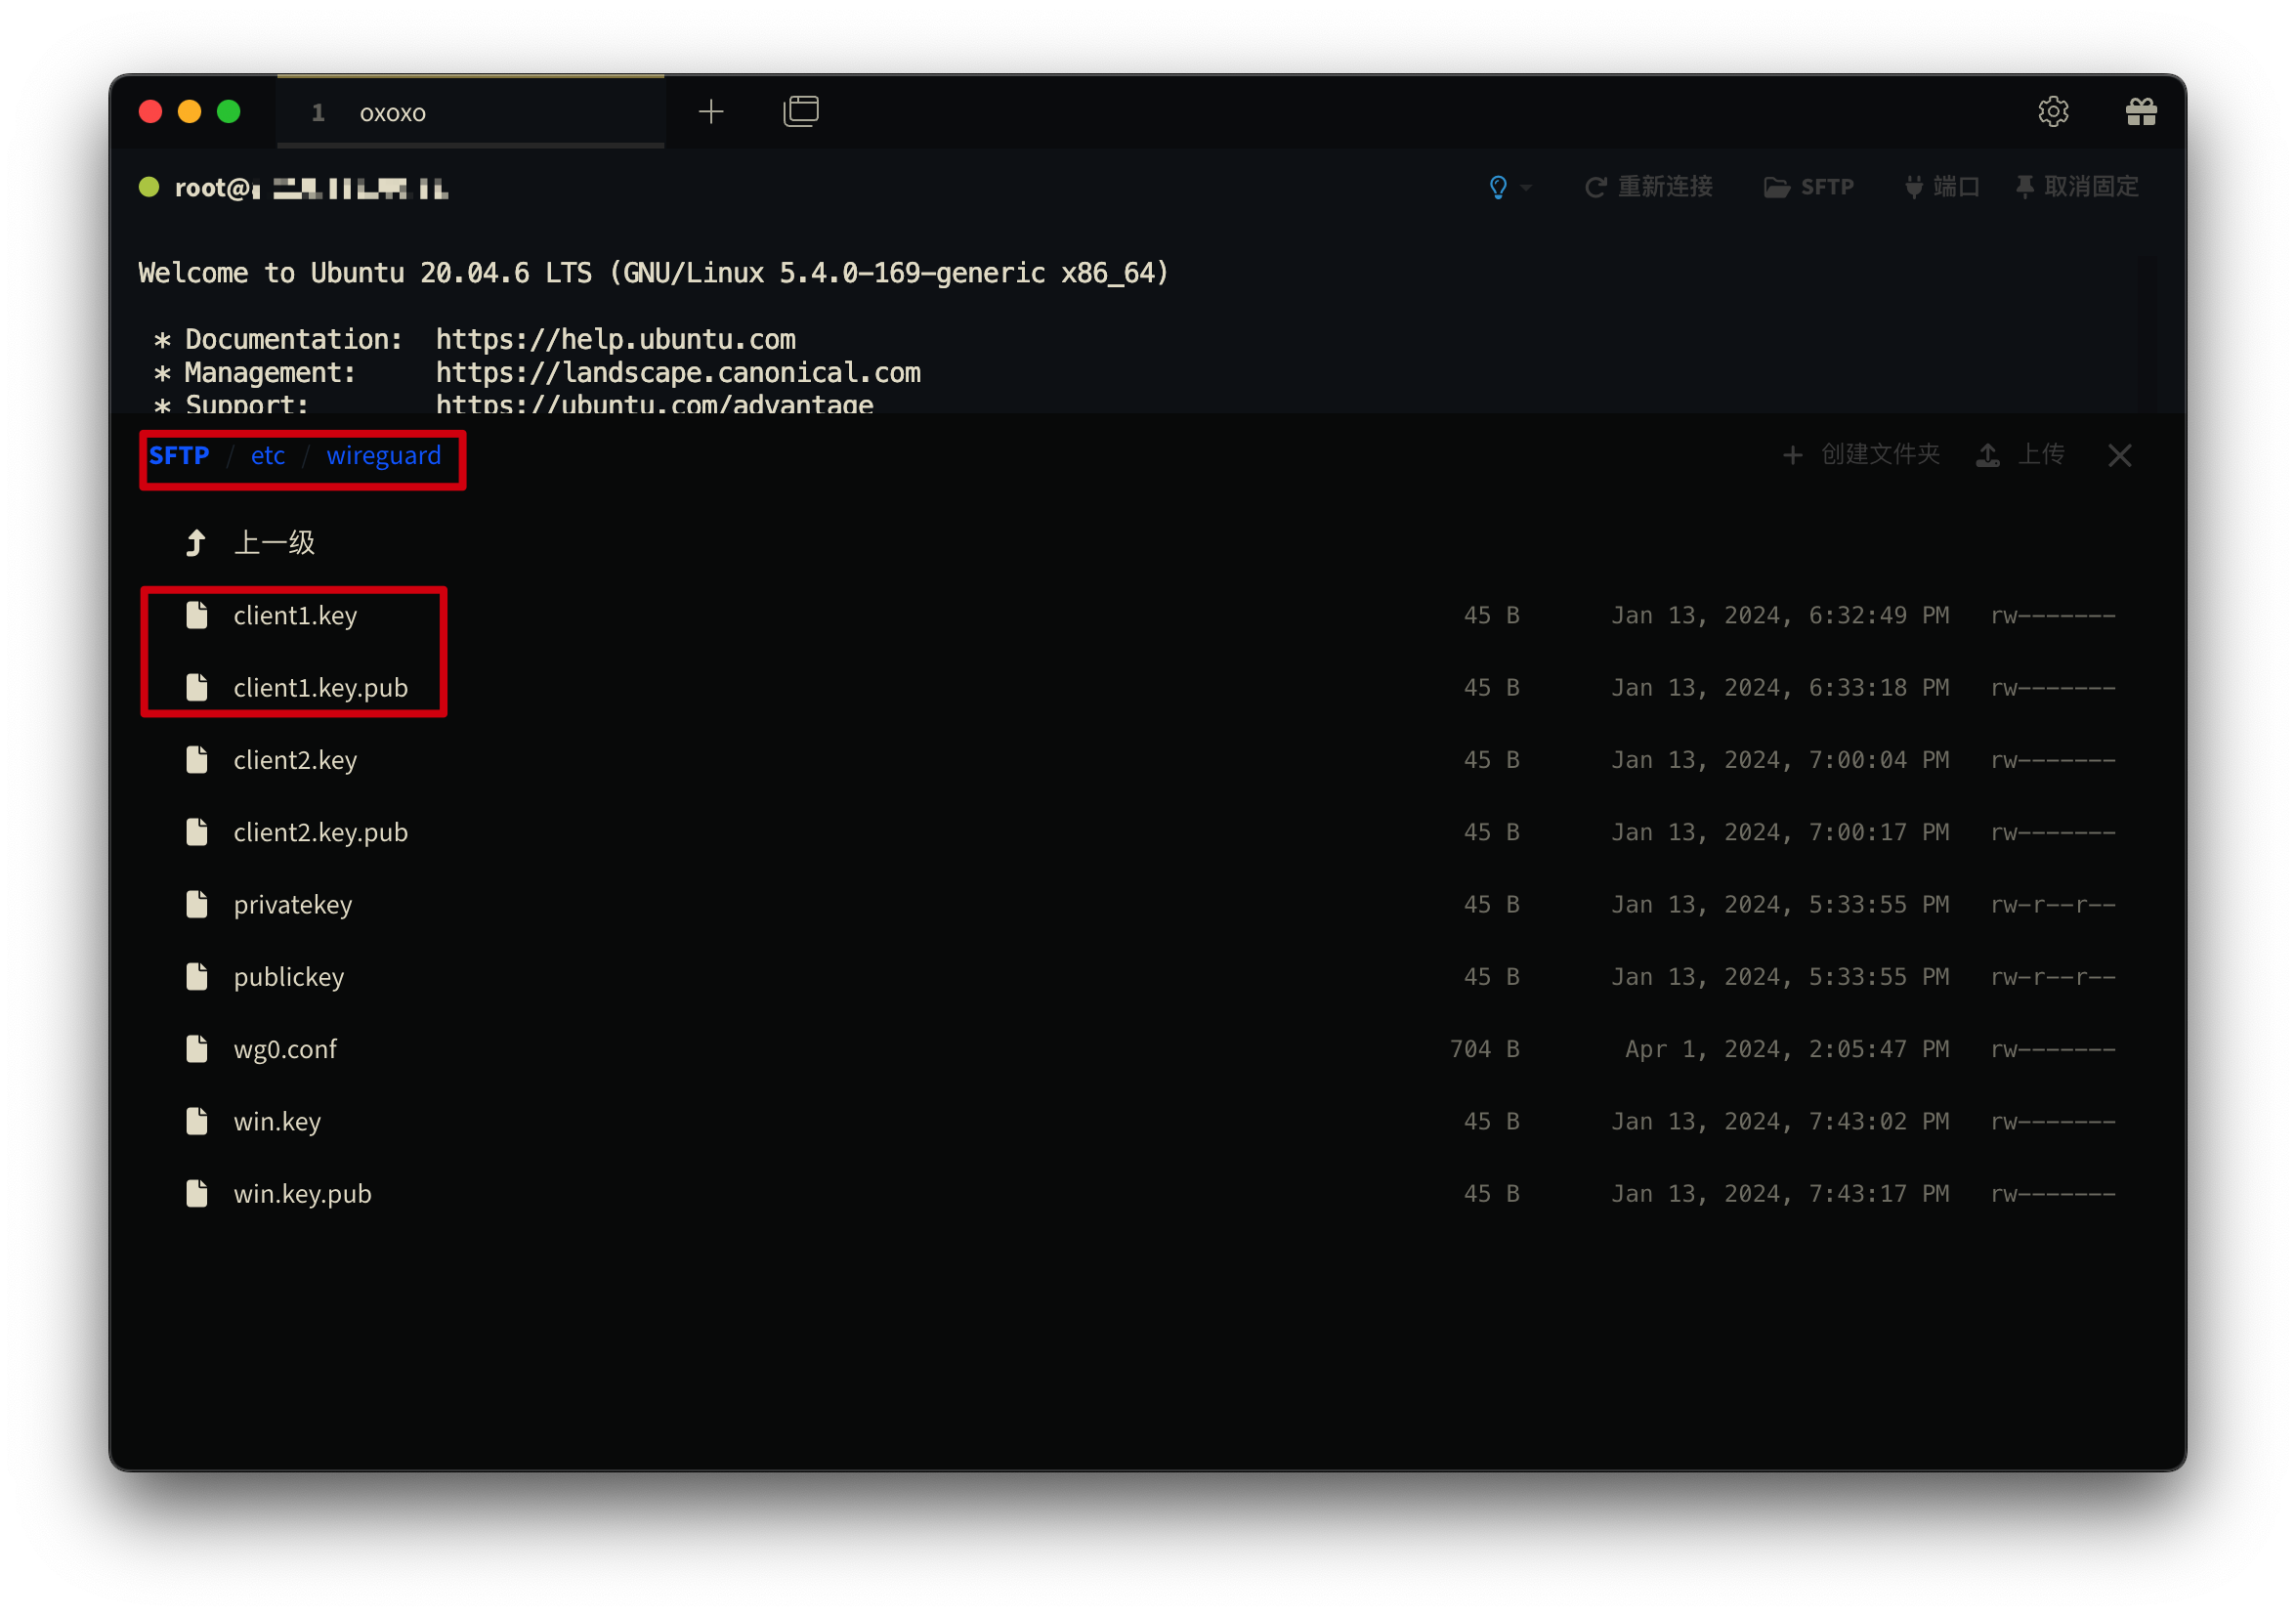
配置 WireGuard【服务端】 #
如果使用的不是 Tabby 客户端,那么可能需要用nano编辑器打开配置文件:
sudo nano /etc/wireguard/wg0.conf
使用 Tabby ,可以右键它在本地编辑文件:/etc/wireguard/wg0.conf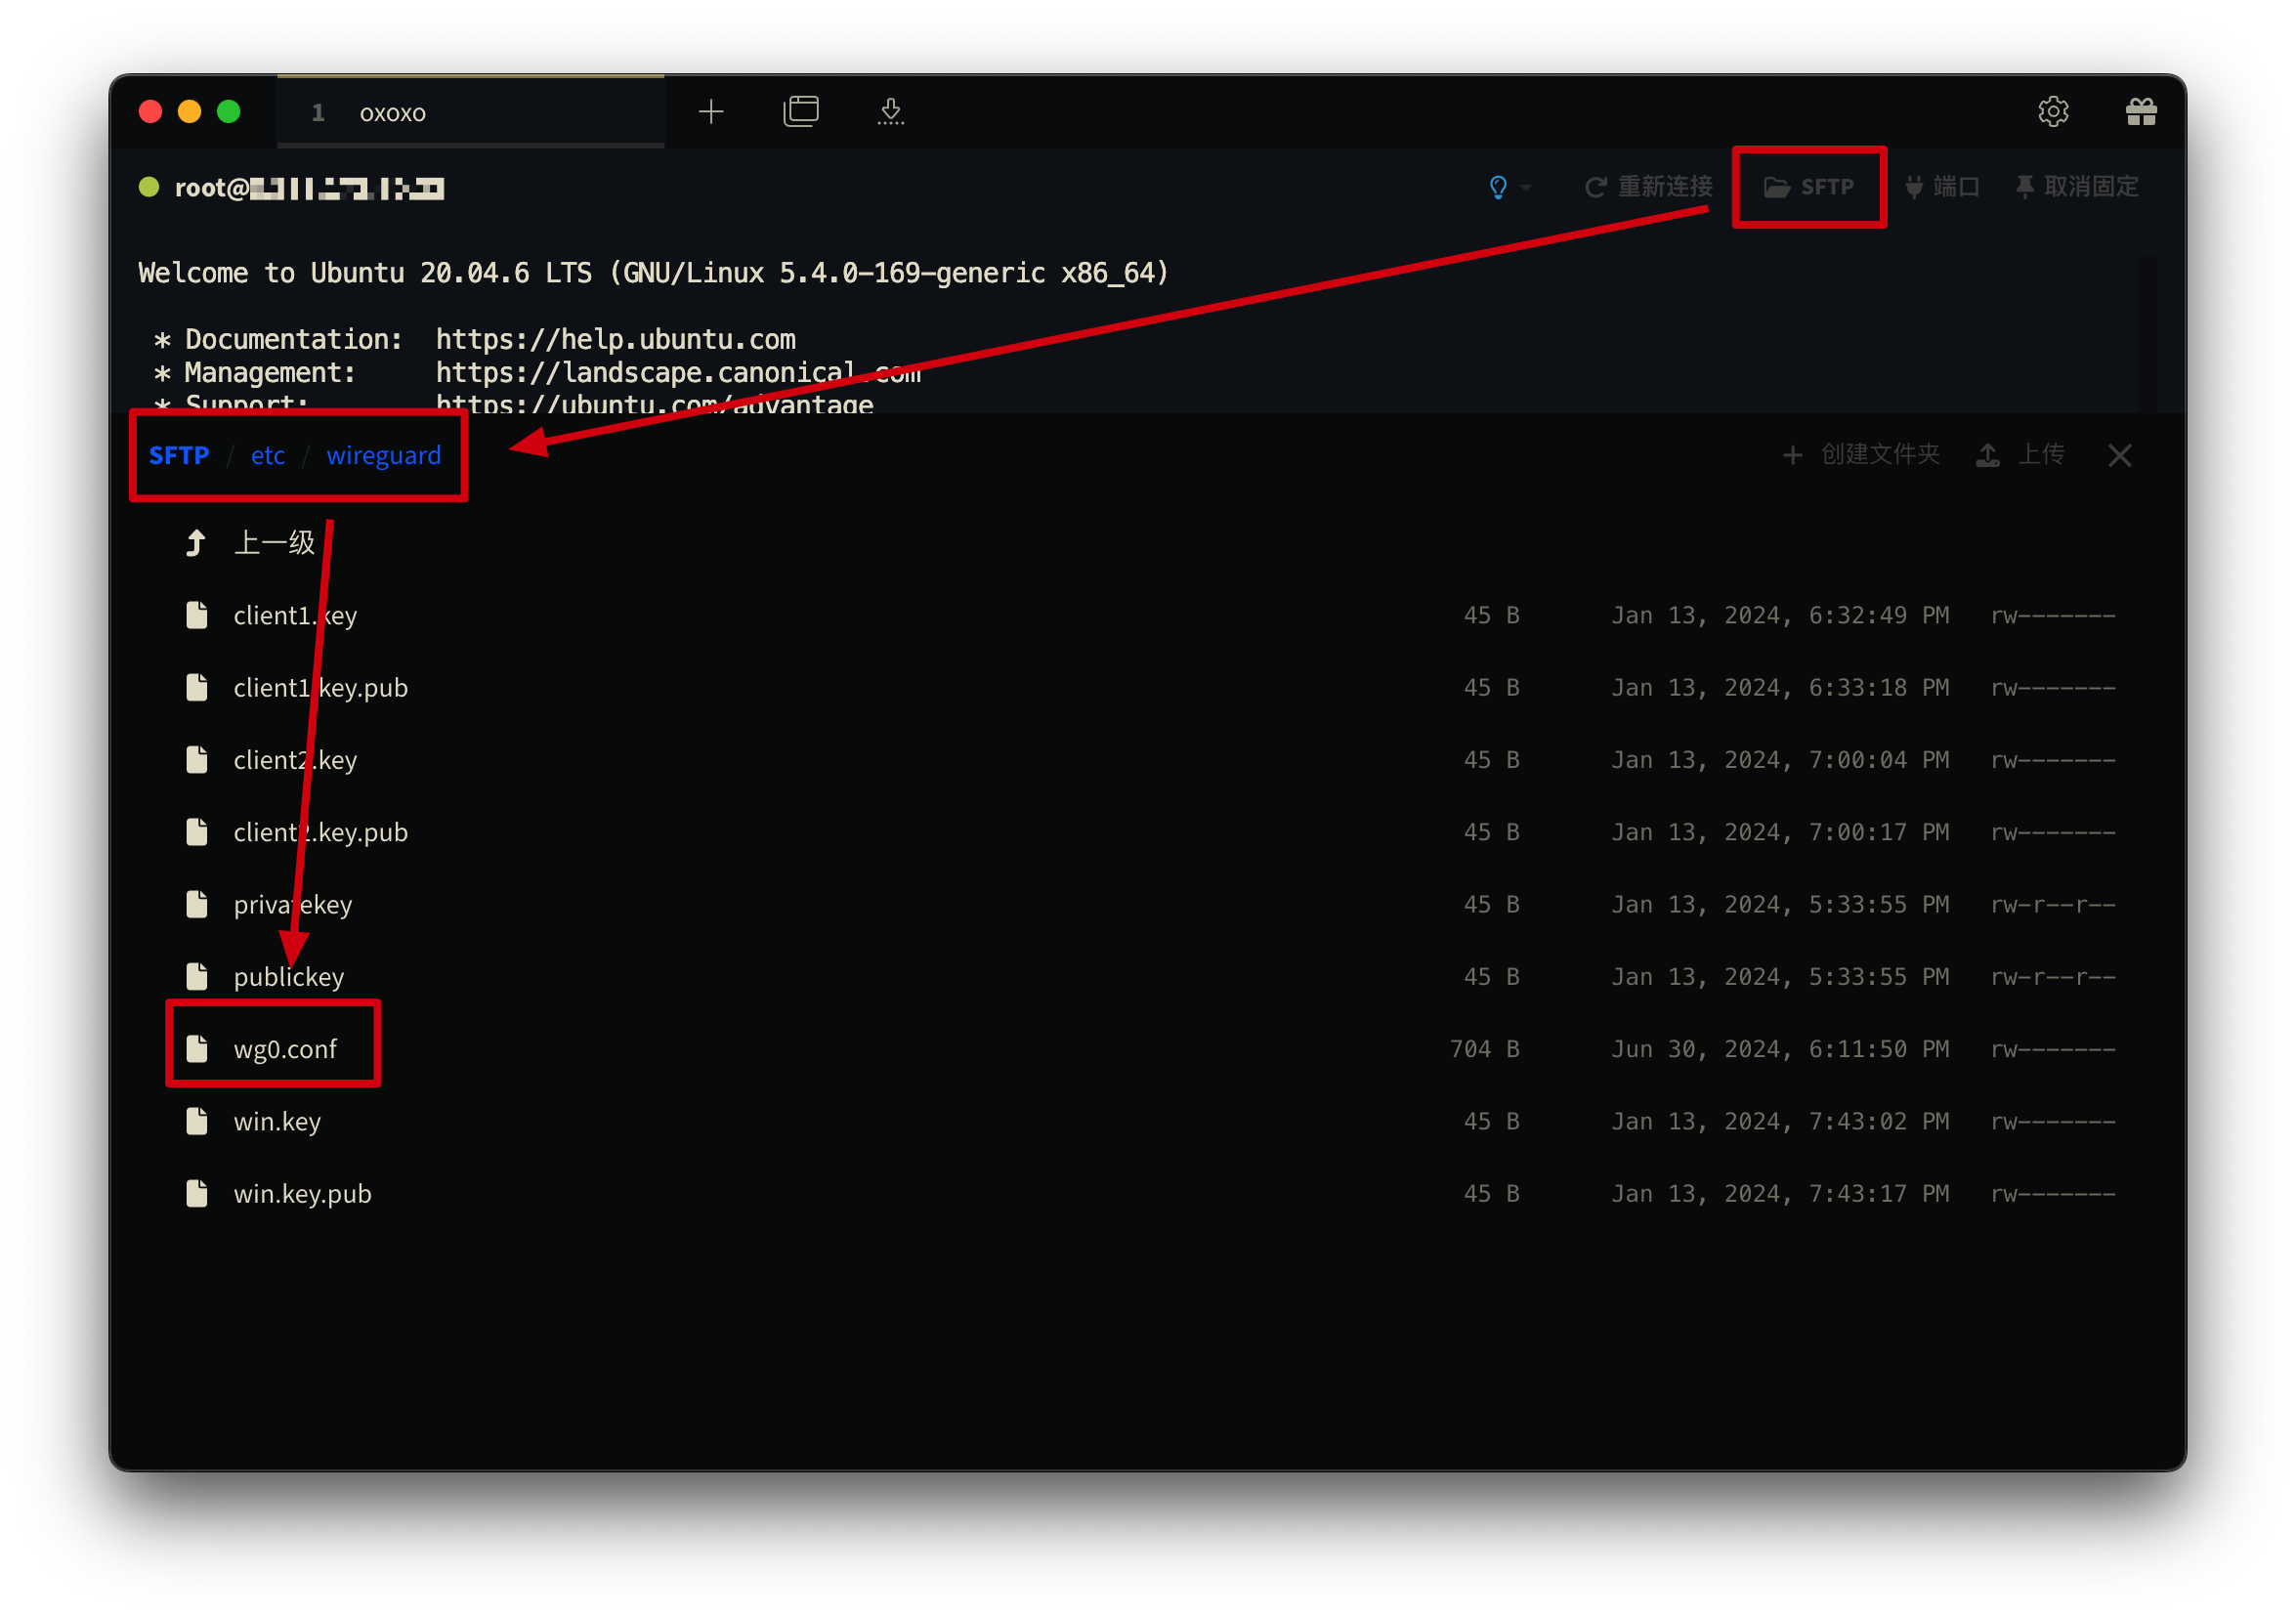
[Interface]
Address = 10.0.0.1/24  # VPN内部的IP地址
SaveConfig = true
PrivateKey = <你的服务器私钥>
ListenPort = 51820

[Peer]
PublicKey = <客户端公钥>
AllowedIPs = 10.0.0.2/32  # 客户端的VPN IP地址
- 查看【服务器】私钥:
cat privatekey - 查看【服务器】公钥:
cat publickey - 查看「客户端」私钥:
cat client1.key - 查看「客户端」公钥:
cat client1.key.pub
启动 WireGuard #
- 设置开机自启:
sudo systemctl enable wg-quick@wg0 - 激活wg0的接口:
sudo wg-quick up wg0

配置防火墙 #
- WireGuard 默认是 (51820/UDP)端口,所以需要在防火墙中放行。
sudo ufw allow 51820/udp
当我们的 WireGuard启动后,就需要设置好客户端,让客户端开启 WireGuard 客户端软件,导入客户端配置文件信息,然后就可以使用这个 VPN 了。
【客户端】安装 WireGuard : #
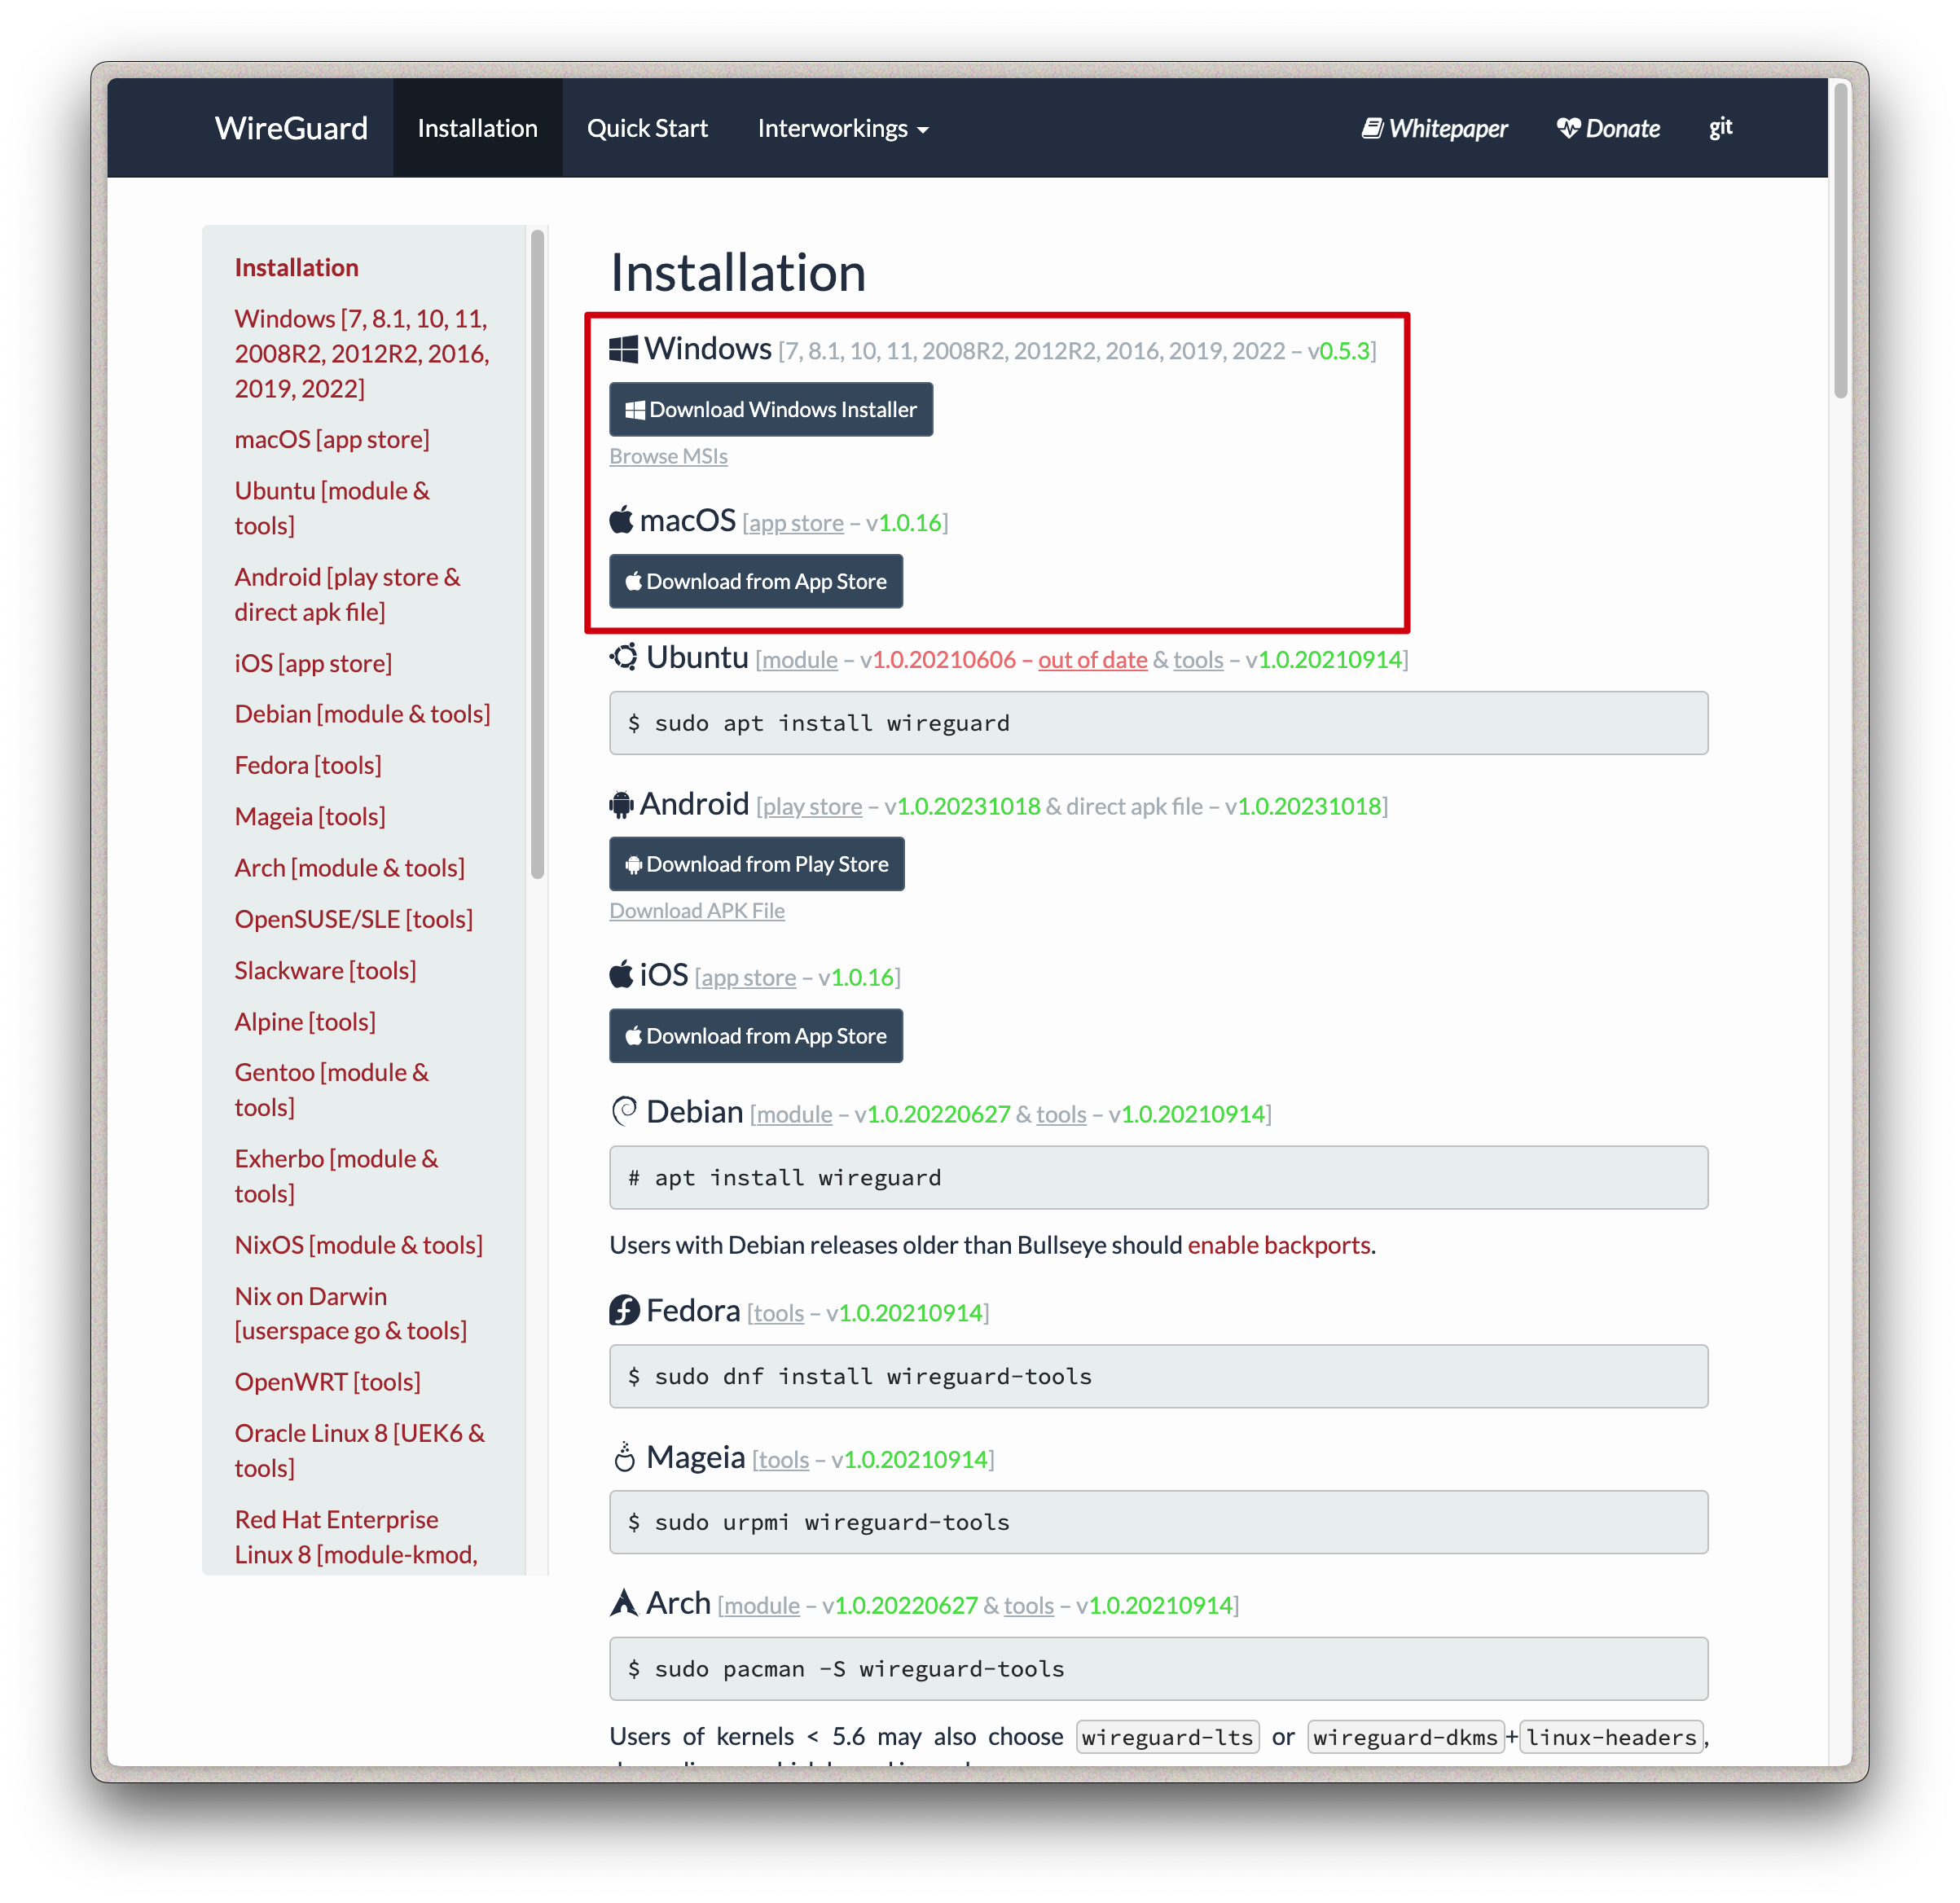
MacOS/Windows/iOS/Android 都有 WireGuard 客户端,iPhone 可以在 App Store 搜索 WireGuard 下载安装。
他们的客户端配置方式都是一样的,只需把填写好的【客户端配置文件】导入,点击启动就可以使用了。这里我们先安装 MacOS 的示范。👇
配置 WireGuard【客户端】 #
每个客户端都需要其自己的配置文件,客户端配置类似服务器的配置。
- [Interface] 部分包含客户端的私钥和分配给客户端的IP地址。
- [Peer] 部分包含服务器的公钥、服务器的外部IP地址以及要路由到VPN到IP范围。
在本地计算机编写一个文件,比如 Mac.conf,内容如下:
例如我计划给iPhone、Mac、Windows都设置,我现在先给Mac设置,所以取名为 Mac.conf。 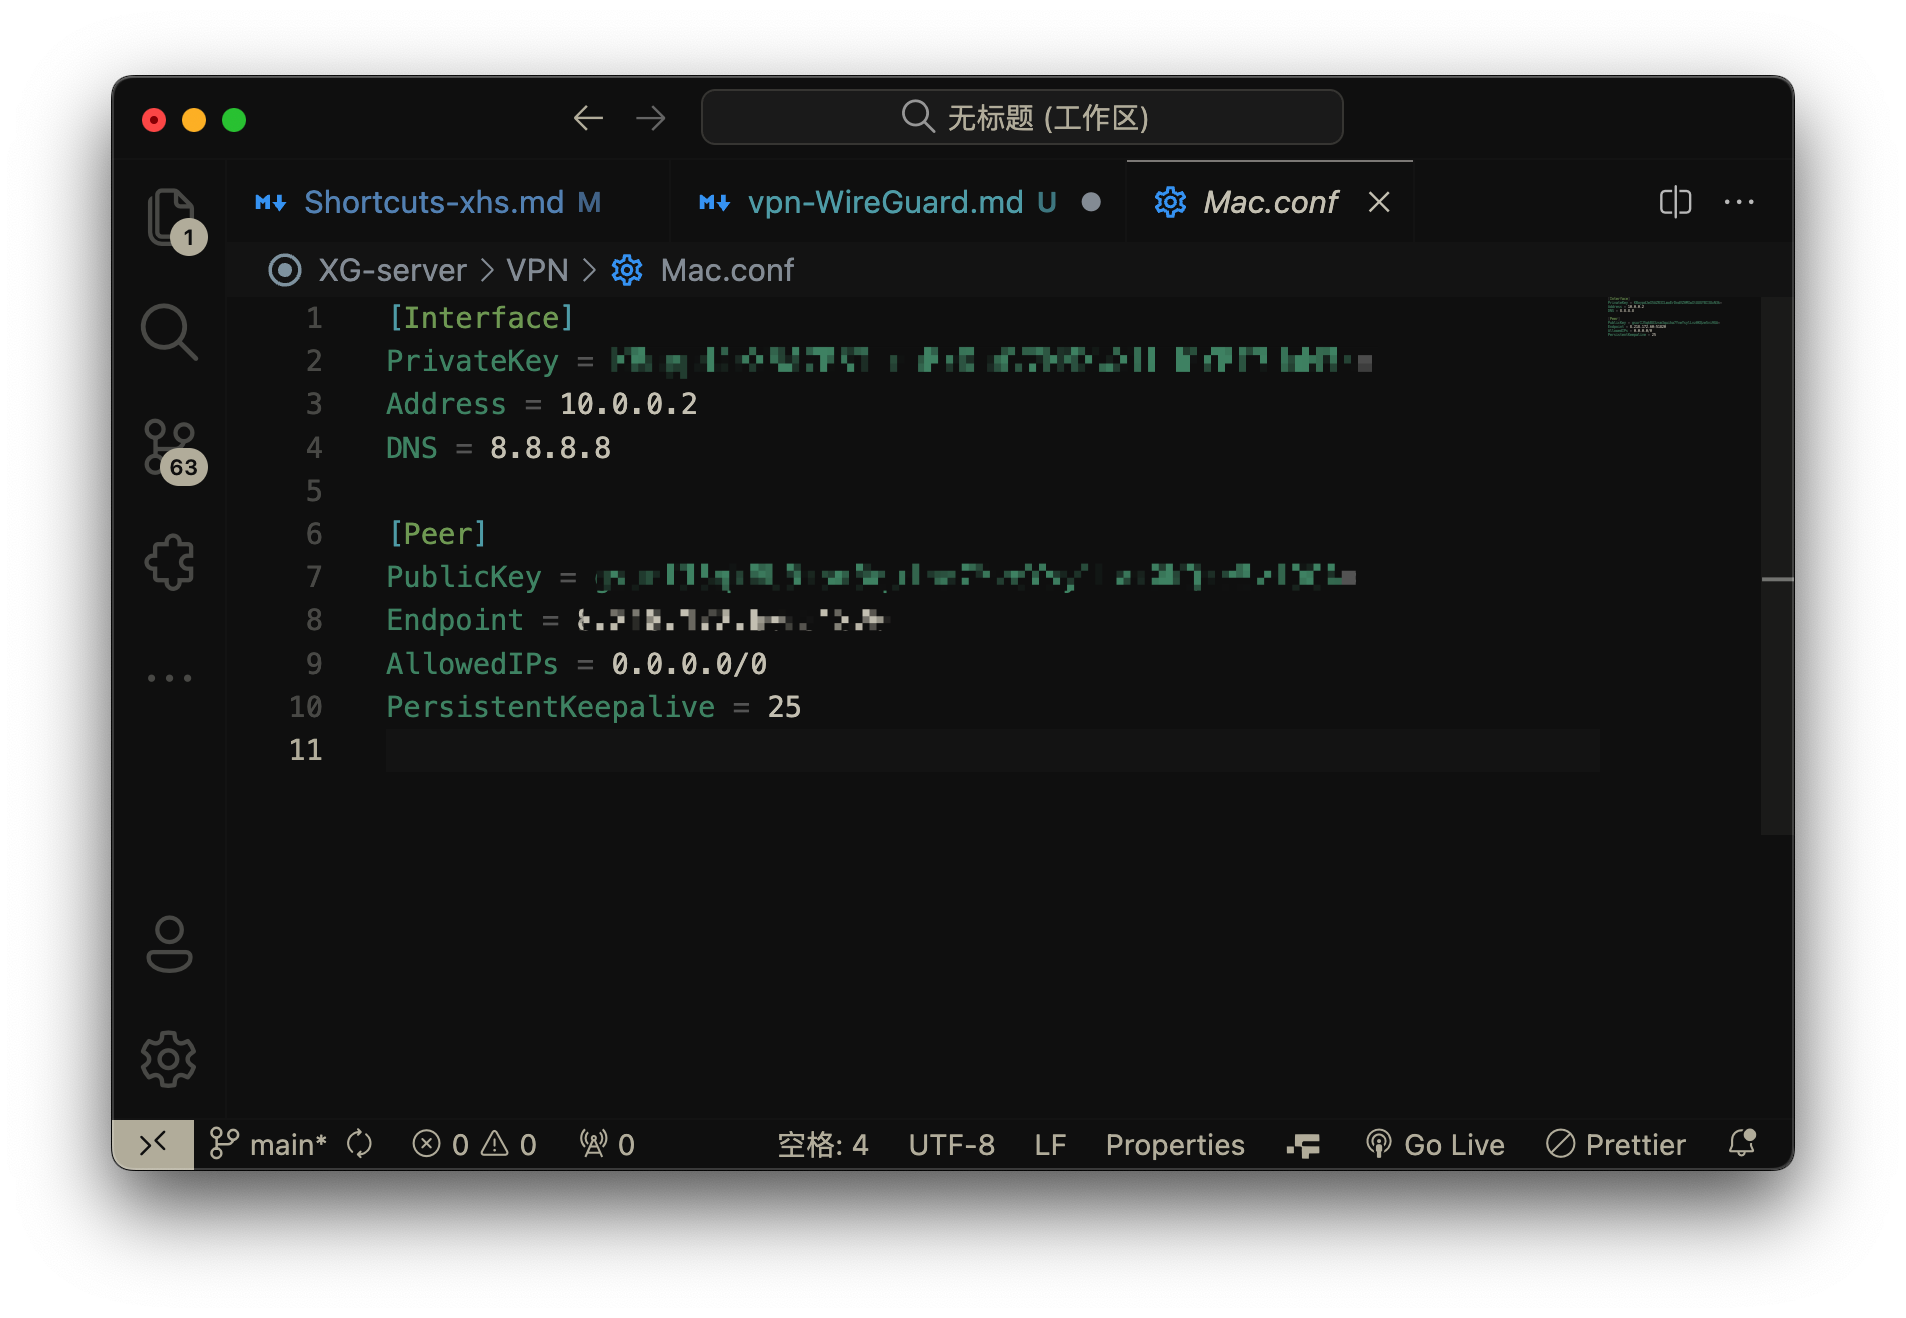
[Interface]
PrivateKey = <客户端私钥>
Address = 10.0.0.2/24
DNS = 8.8.8.8

[Peer]
PublicKey = <服务器公钥>
Endpoint = <服务器外部IP地址>:51820
AllowedIPs = 0.0.0.0/0
PersistentKeepalive = 25
后面可以给 iPhone、Windows、Mac 都配置一份配置文件。
【注意】:这些命令是在服务器上安装了 WireGuard 的目录下执行,以此来查看的。
- 查看【服务器】私钥:
cat privatekey - 查看【服务器】公钥:
cat publickey - 查看「客户端」私钥:
cat client1.key - 查看「客户端」公钥:
cat client1.key.pub
【客户端】软件下载后正常安装,然后点开配置,把之前写好的配置文件导入。
然后点击启动就可以开启【 VPN 】了
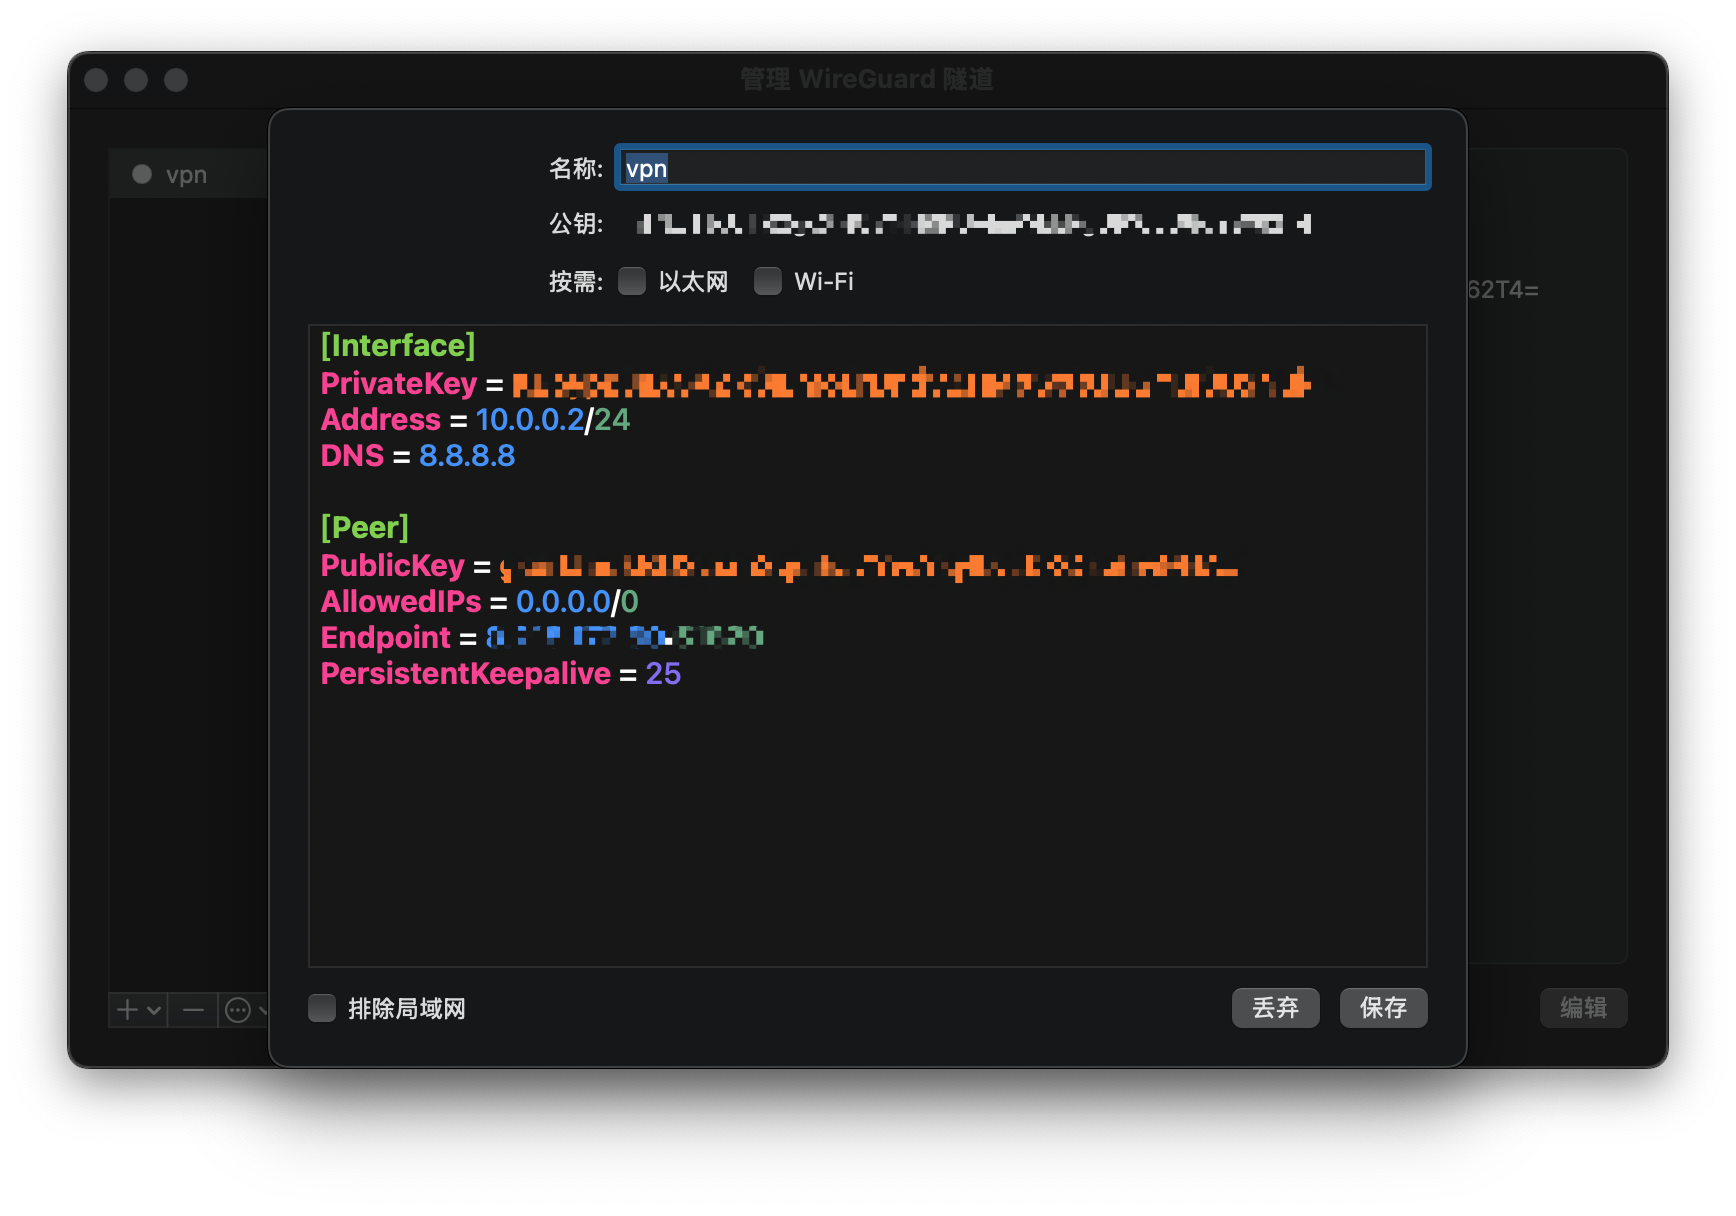
🎉 然后你就可以访问 Google、YouTube 等网站了。
